Overview
You may update the behavior of your client onboarding process using Employee Portal > Settings > Client Onboarding
In this tutorial we will show you how to:
- Update regular and optional premium service area
- Configure your signup form
- Adjust callouts and disclaimers
- Change content on your thank you pages
- Adjust email settings
- Change terms of use
- Personalize form with your logo and branding color
Service area setup
You may specify your service area using zip codes. If you do not cover all areas within certain zip codes, you could insert a disclaimer saying that all areas within certain zip codes may not be covered.
You have an option to categorize your zip codes under regular and premium pricing zones. Premium zip code zone is optional and it allows you to charge more for the same service because those zip codes may be exclusive zip codes or further away.
You may add more zip codes one at a time or multiple zip codes at once if you separate them by comma.
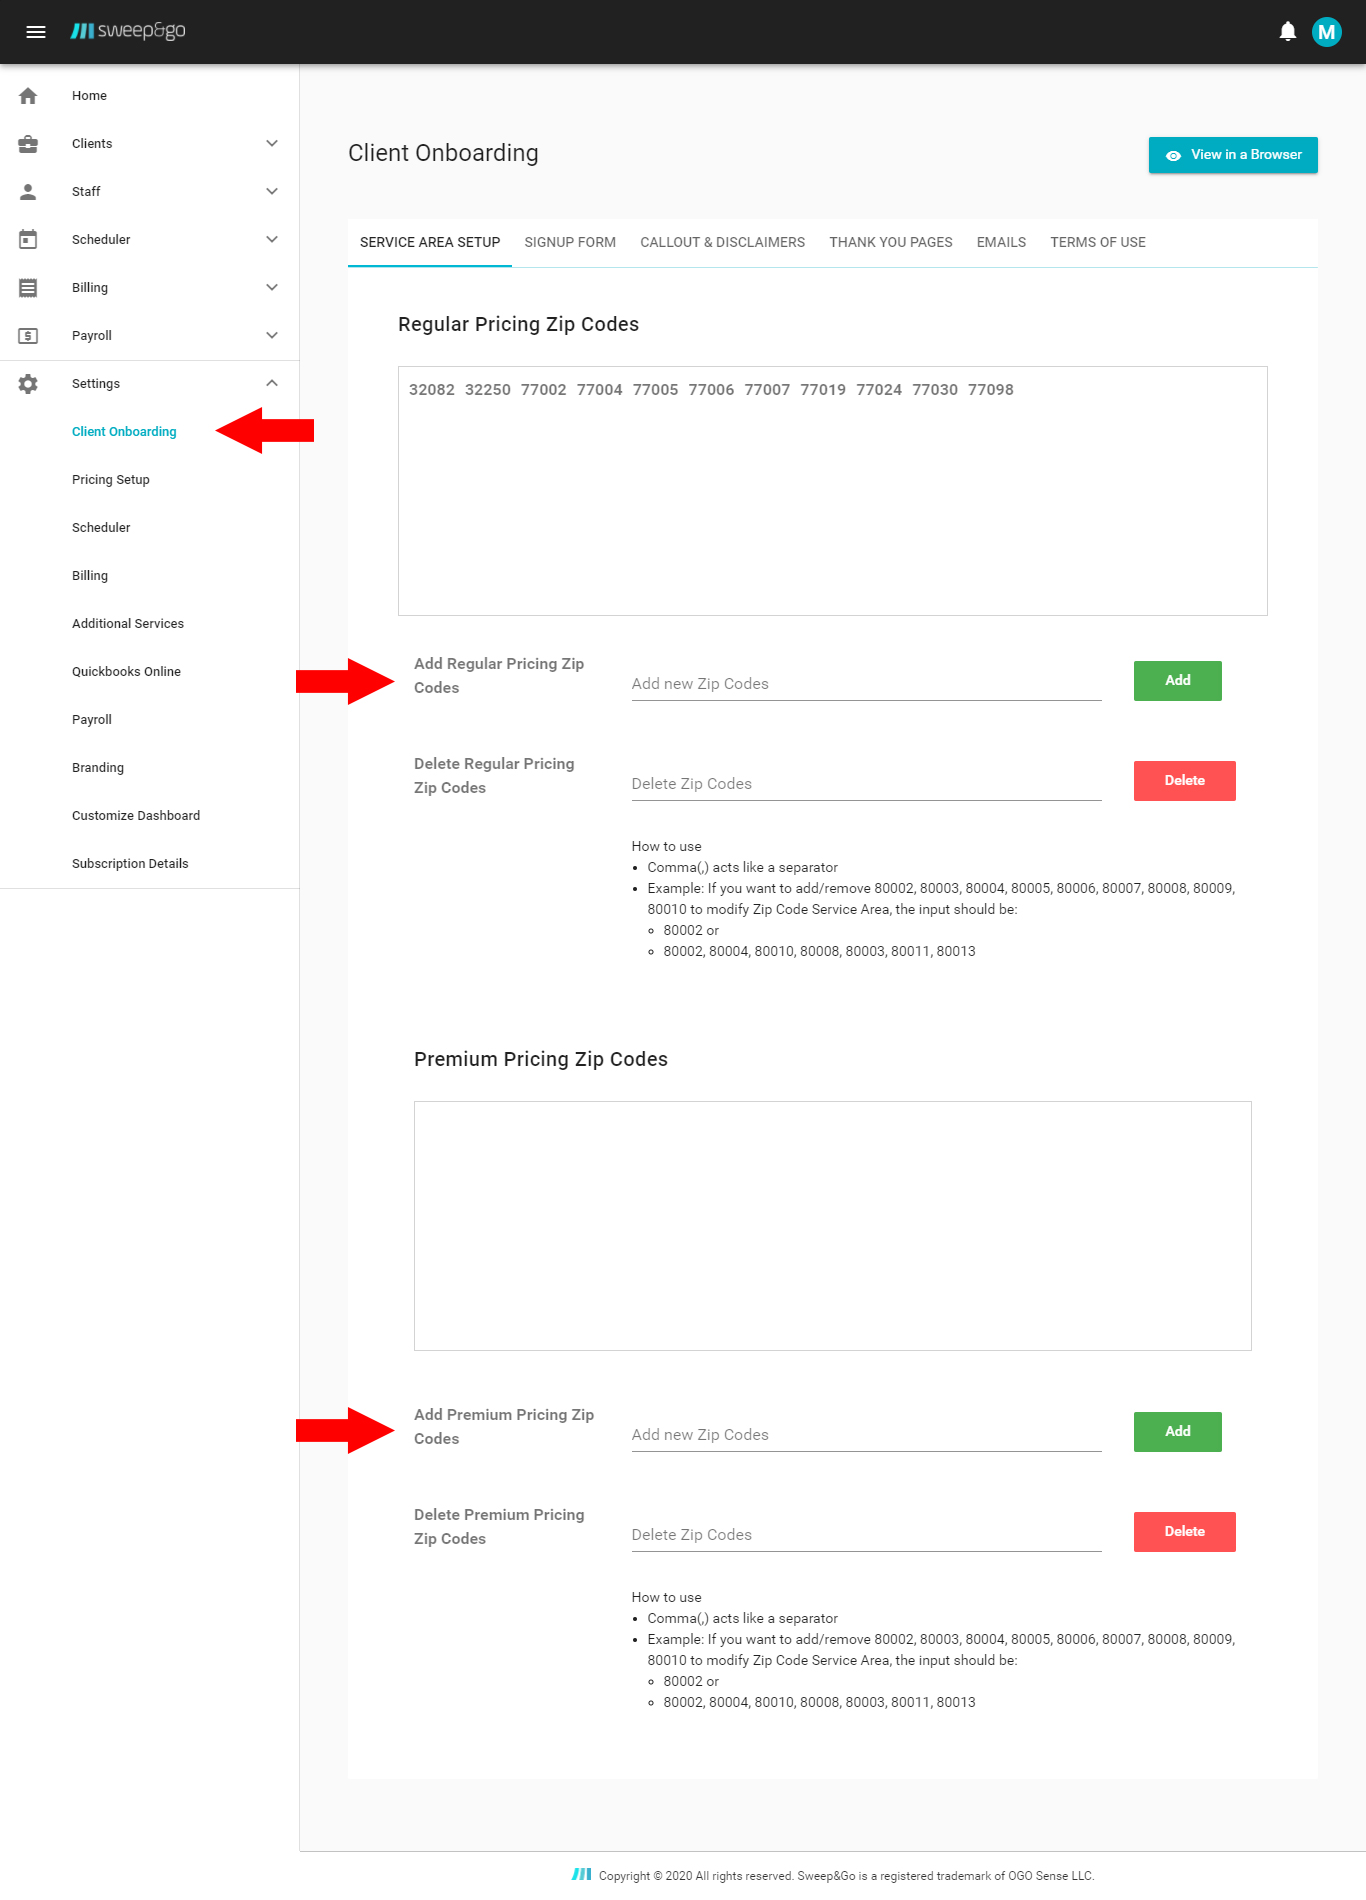
Update regular and premium pricing zones
Signup Form
Within the signup form section you may modify your client onboarding form fields.
If you run special promos, keep the coupon code option enabled.
By default, clients may choose up to 4 dogs but you may allow them to choose up to 10 dogs.
Check all cleanup frequencies that you wish to offer.
It is a good practice to ask for dog names and if it’s safe for you to be in the same yard with client dogs.
You may ask for gate location and gated community code.
You may ask for areas to clean and choose what areas a client may select.
There are 3 cleanup notifications (on the way, completed, off-schedule) and they may be sent 3 different ways (text, call, email).
If the check payment method is enabled, then a client may sign up without adding a credit card on file.
You may ask for referral information and additional comments.
After you make changes, make sure to click “Save Changes” on the bottom of the page. To view your client onboarding form, please click “View in a Browser”
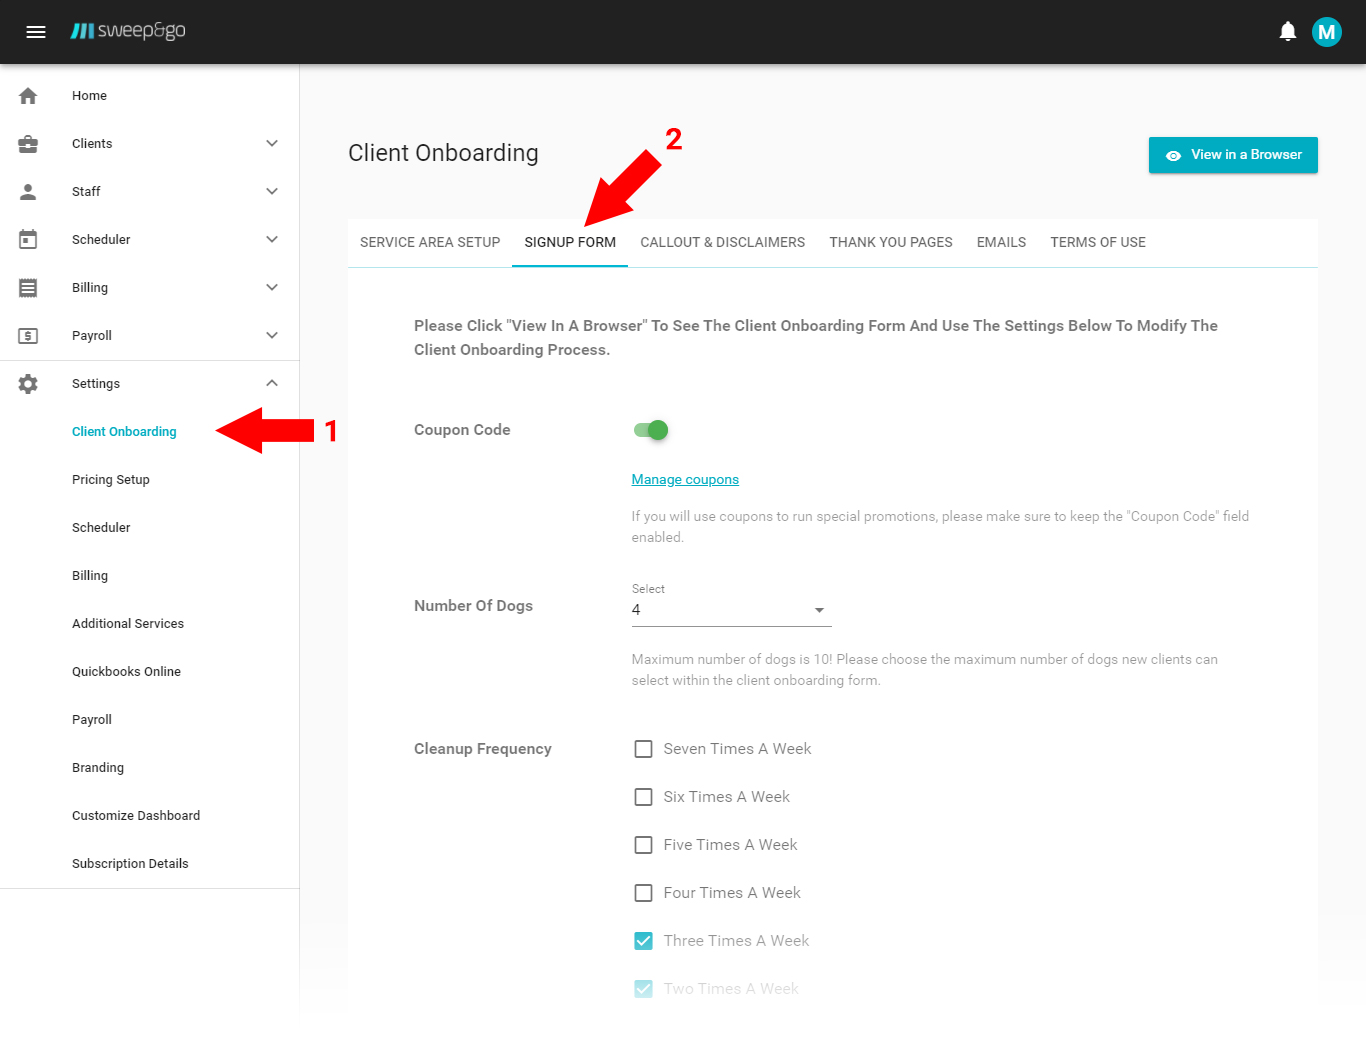
Customize what information you are asking for
Callouts & Disclaimers
Callouts & Disclaimers are intended for marketing messages or very important disclaimers such as key selling points and additional charges. Callout text will be displayed at the top of the pricing section on the client onboarding form. Disclaimers text will be displayed at the bottom of the pricing section on the client onboarding form.
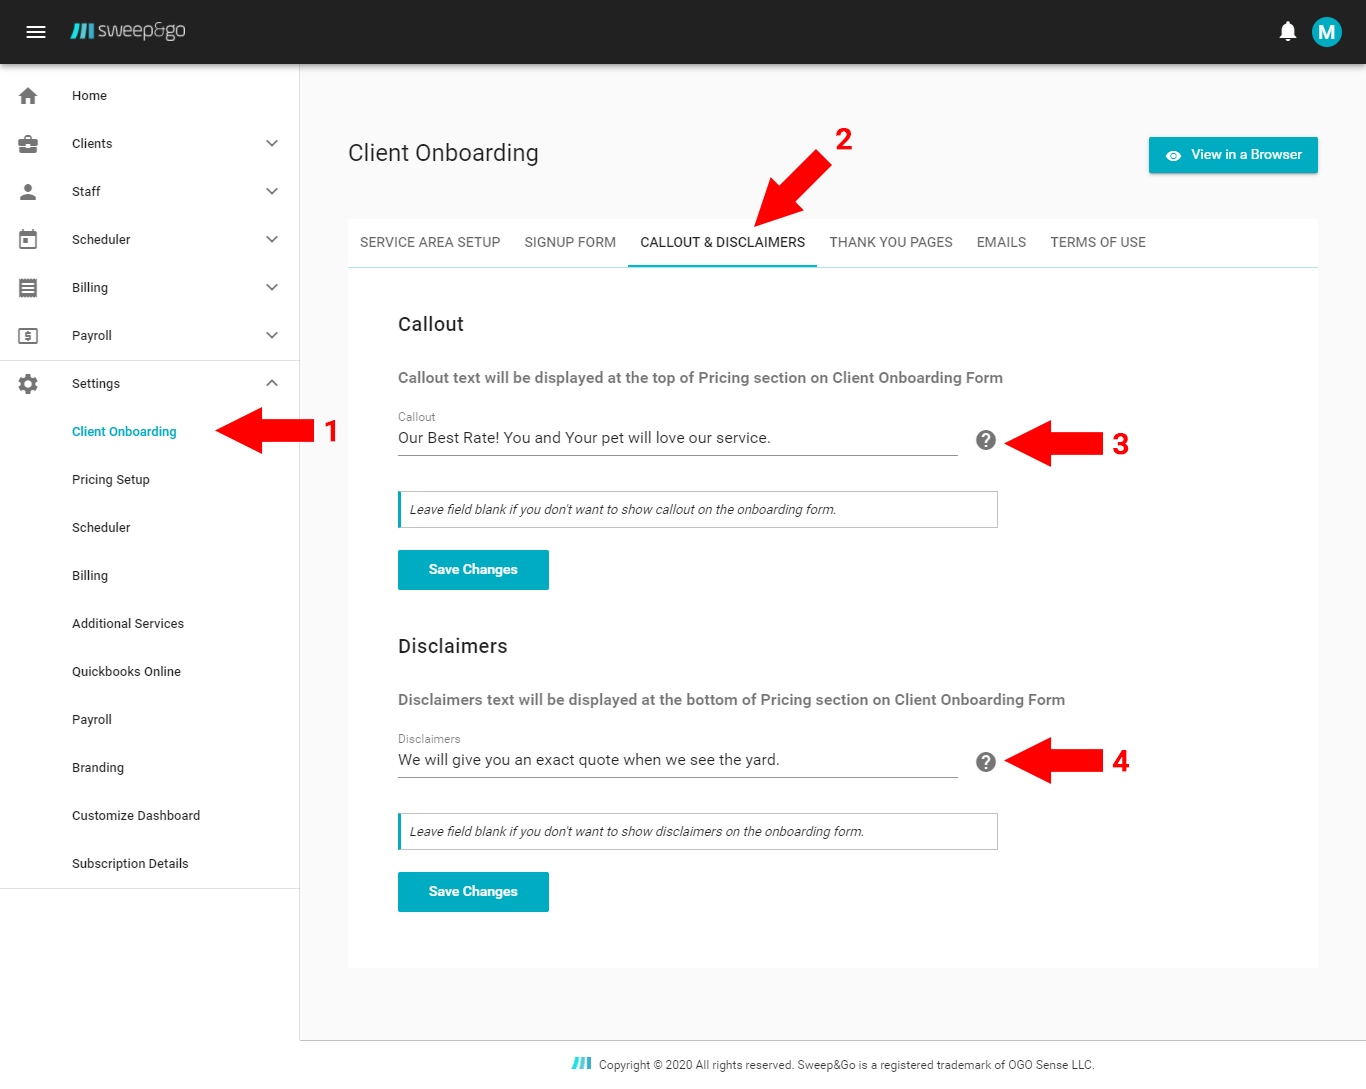
Update your callouts and disclaimers
Thank You Pages
Thank you page is shown at the end of the client signup process. There are separate thank you pages for credit card signup, pay by check signup and one time cleanup. You should update the default content if it does not align with your business policies.
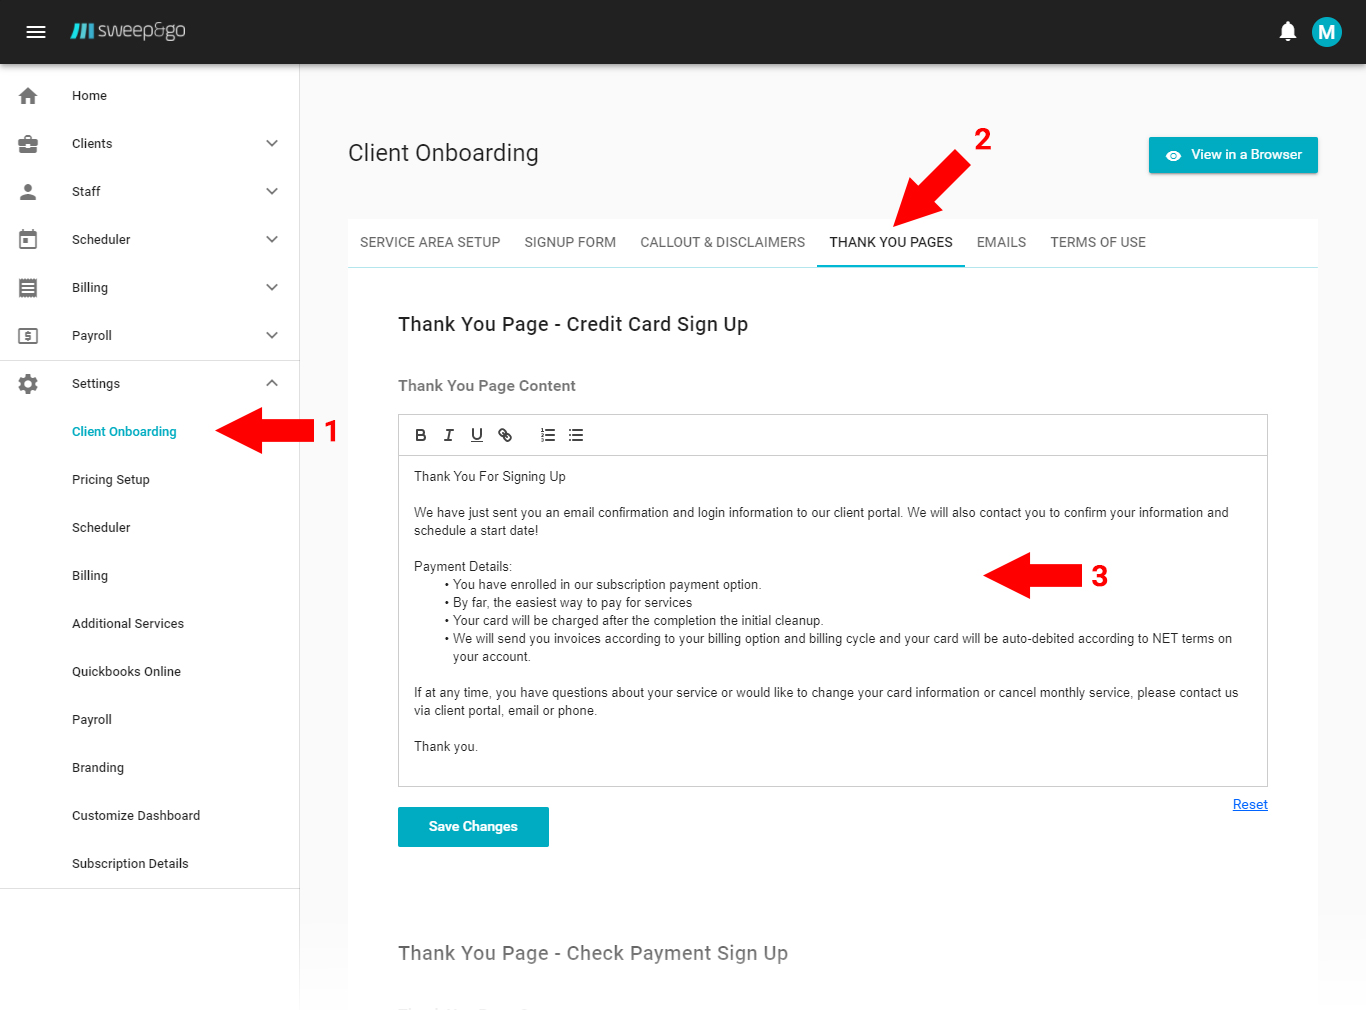
Update thank you pages content
Email Settings
You may update the reply to name and email address. By default reply to name is your company name and reply to email address is your company email address entered during the initial registration process.
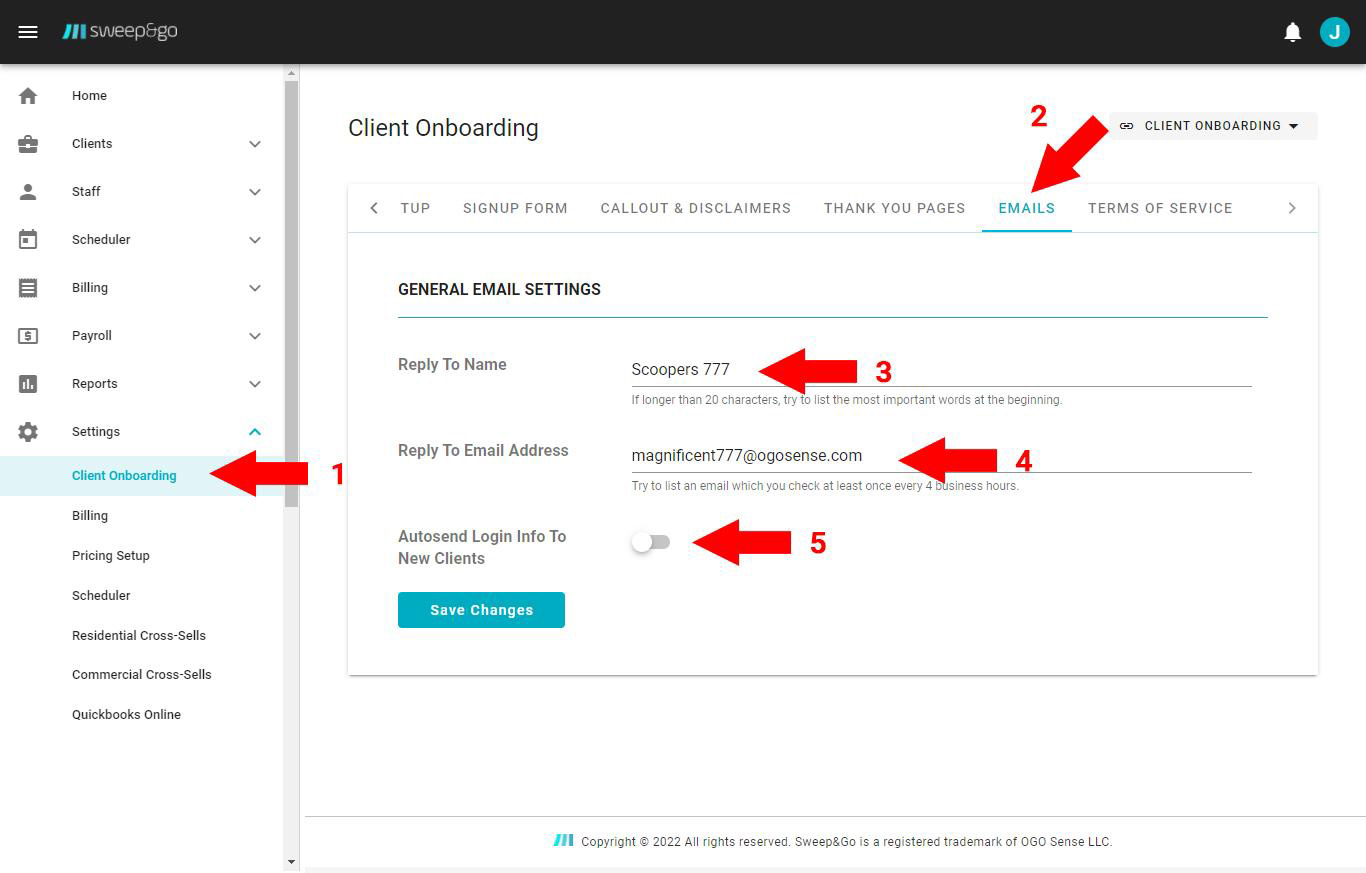
General email settings
When you add a client through the employee portal or client signs up through the onboarding form, automatic email with login info for the client portal is sent to the client. If you don’t want to auto send login info to new clients you may disable this option. Make sure to save any changes.
Terms of Use
You should add your own terms of service or update default terms of service that new clients must accept when they onboard on their own.
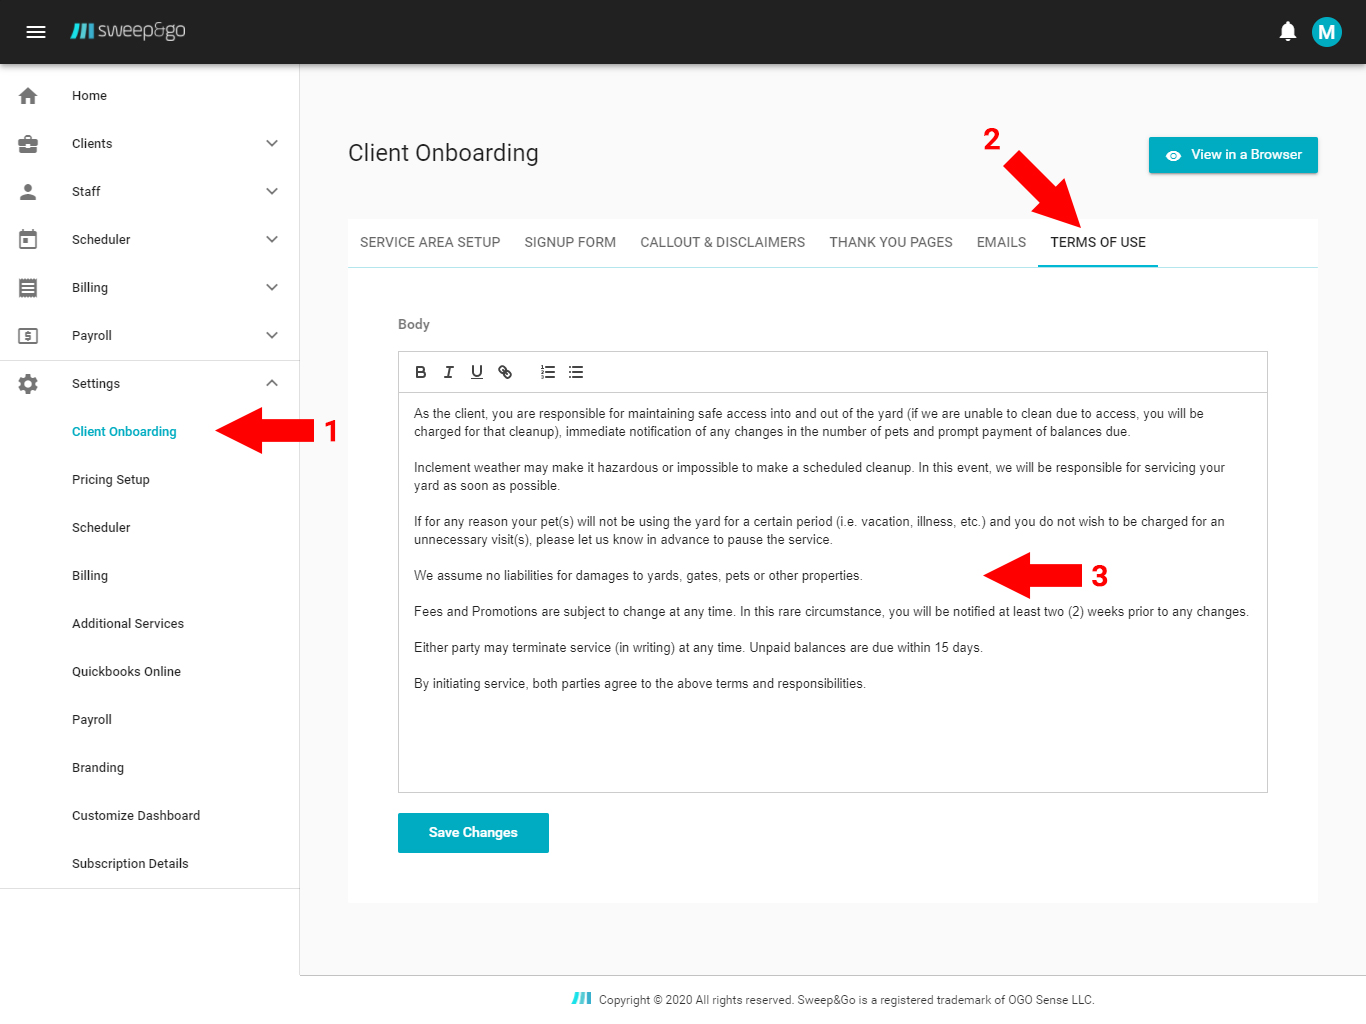
Update your terms of service
For clients who are added through the employee portal you may send Terms of service email for digital signing manually. Go to client details > scroll down to Terms of service section > click on Send Terms of service button > Send.
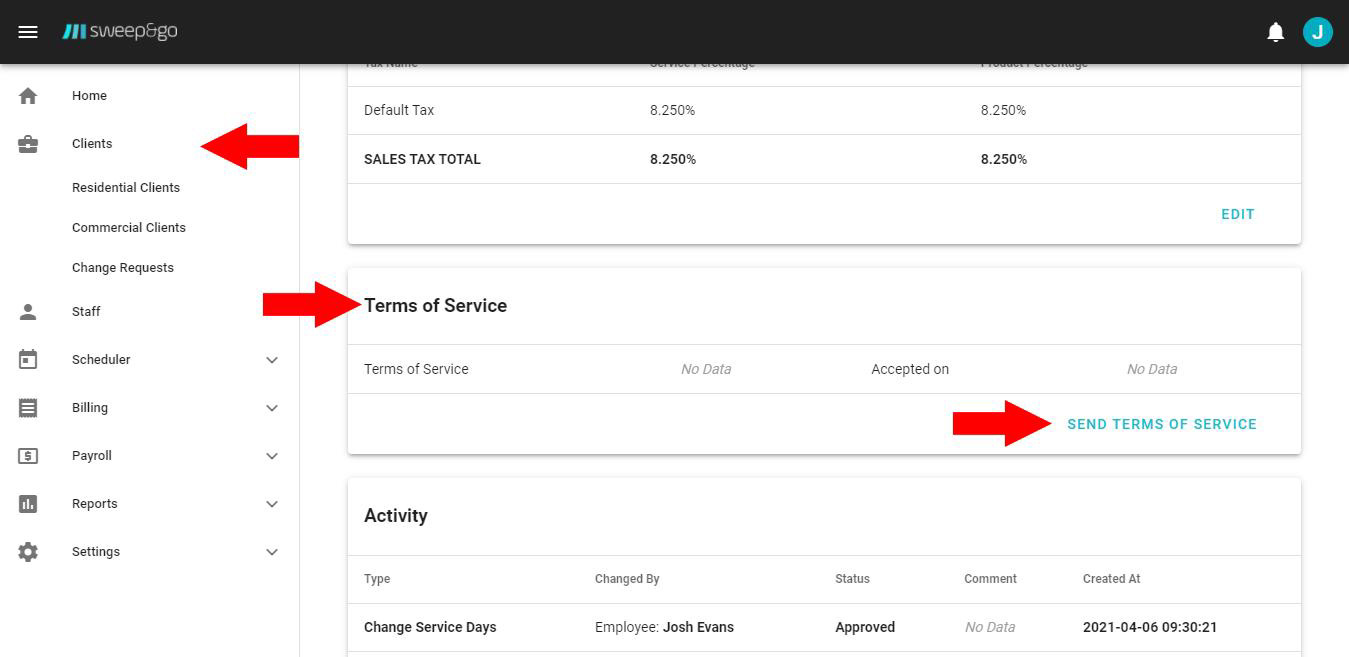
Send Terms of service for digital signing
After you send Terms of service, the client will receive an email to review it and accept. After clicking on the link, the client will need to select a checkbox before accepting the TOS. When the client accepts TOS he will receive a thank you email with his own copy.
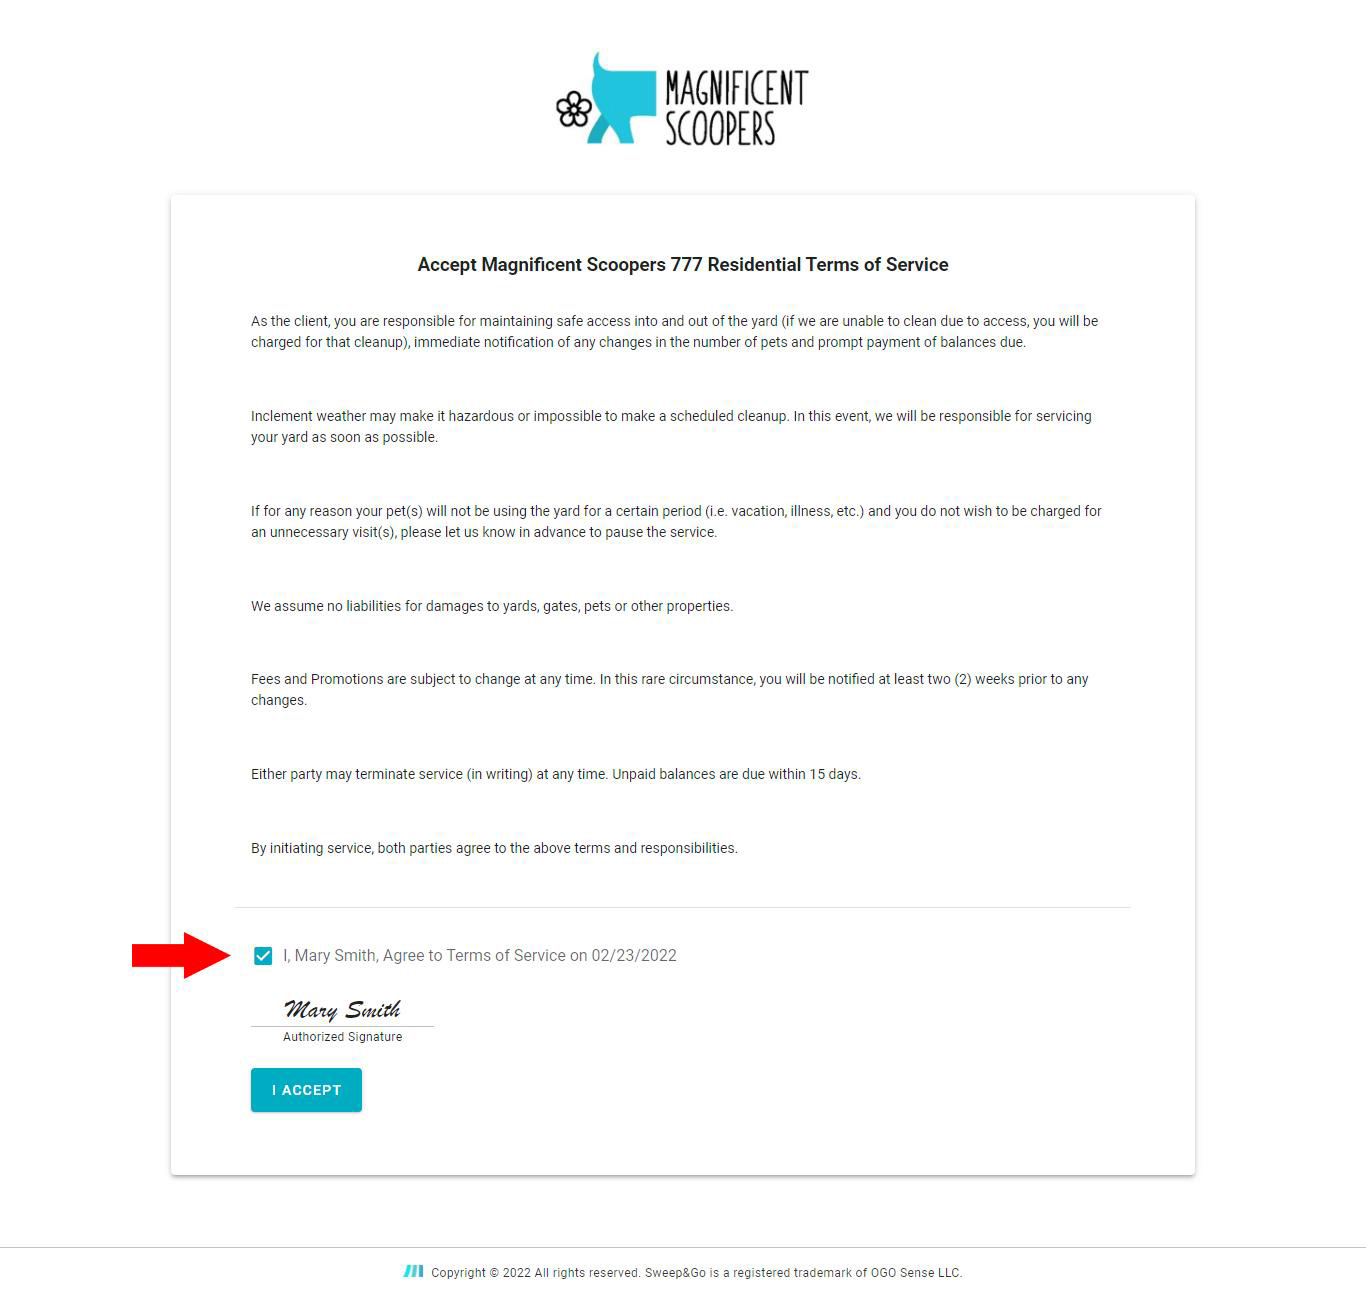
Review and accept Terms of service
Signup Form Branding
To personalize your onboarding form you may upload your logo and choose your branding color within Employee Portal > Settings > Branding > Edit.
To upload the logo click on Upload Logo button > choose the logo > Save.
Before saving your changes make sure to enable showing the logo on the onboarding form!
To link your logo on the client onboarding form to your website, simply insert your website url in the following format https://www.example.com/
To update your branding color you may use the color picker or you may manually type the hex code of your branding color. Make sure to save the changes.
If you want to track how many visits you receive to your signup form/pricing calculator you may insert Google Analytics Tracking ID in this section. Note: Sweep&Go does not support Google Analytics version 4, instead you would need to use an older version.
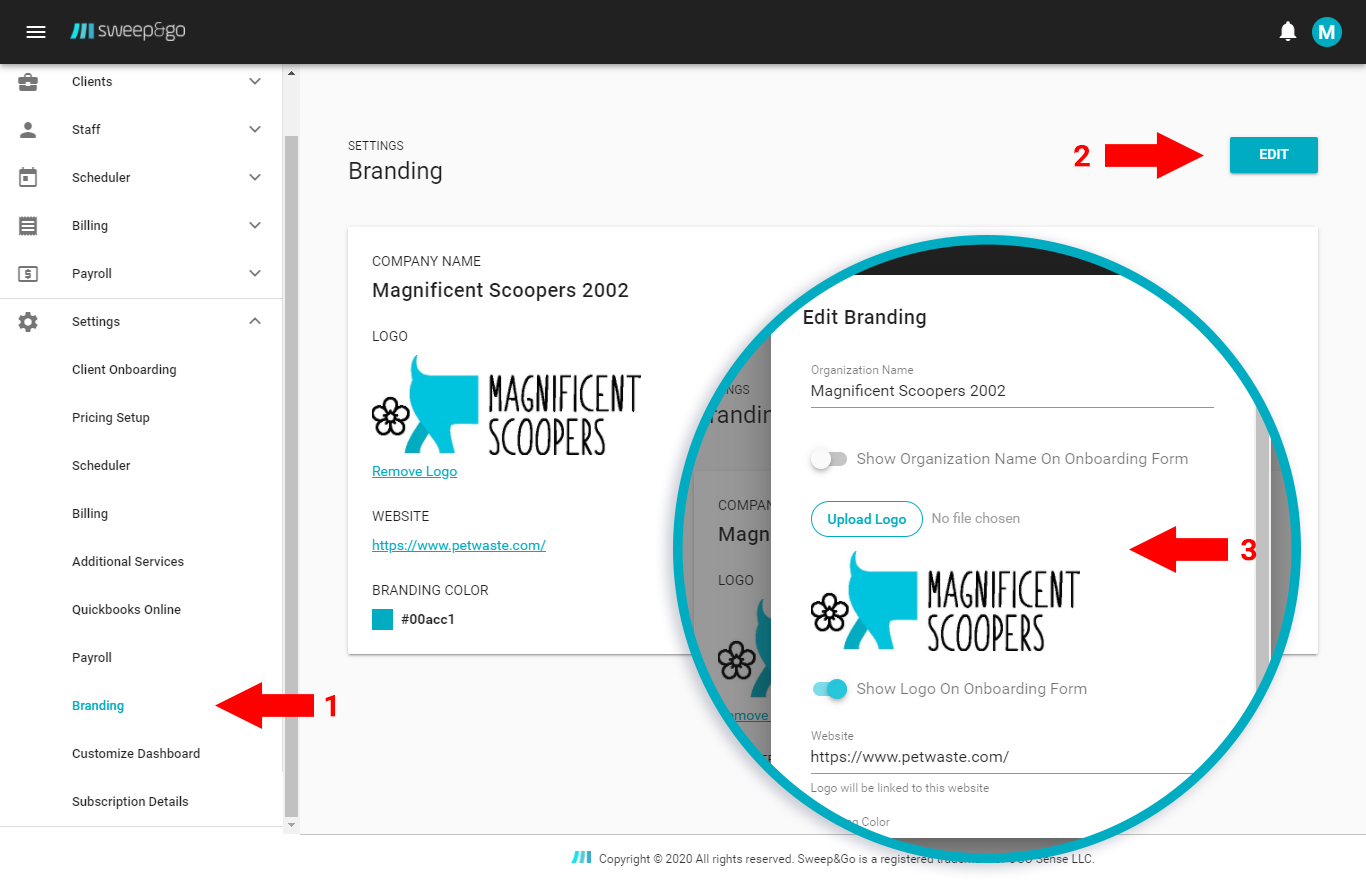
Personalize your client onboarding form