This tutorial will guide you through the process of styling the client onboarding form. We’ll be using a design created by our designer, so it’s advisable to have a designer for more complex designs.
If you don’t have a designer, don’t worry! This tutorial will also assist you in applying some simple styling to enhance the form’s appearance.
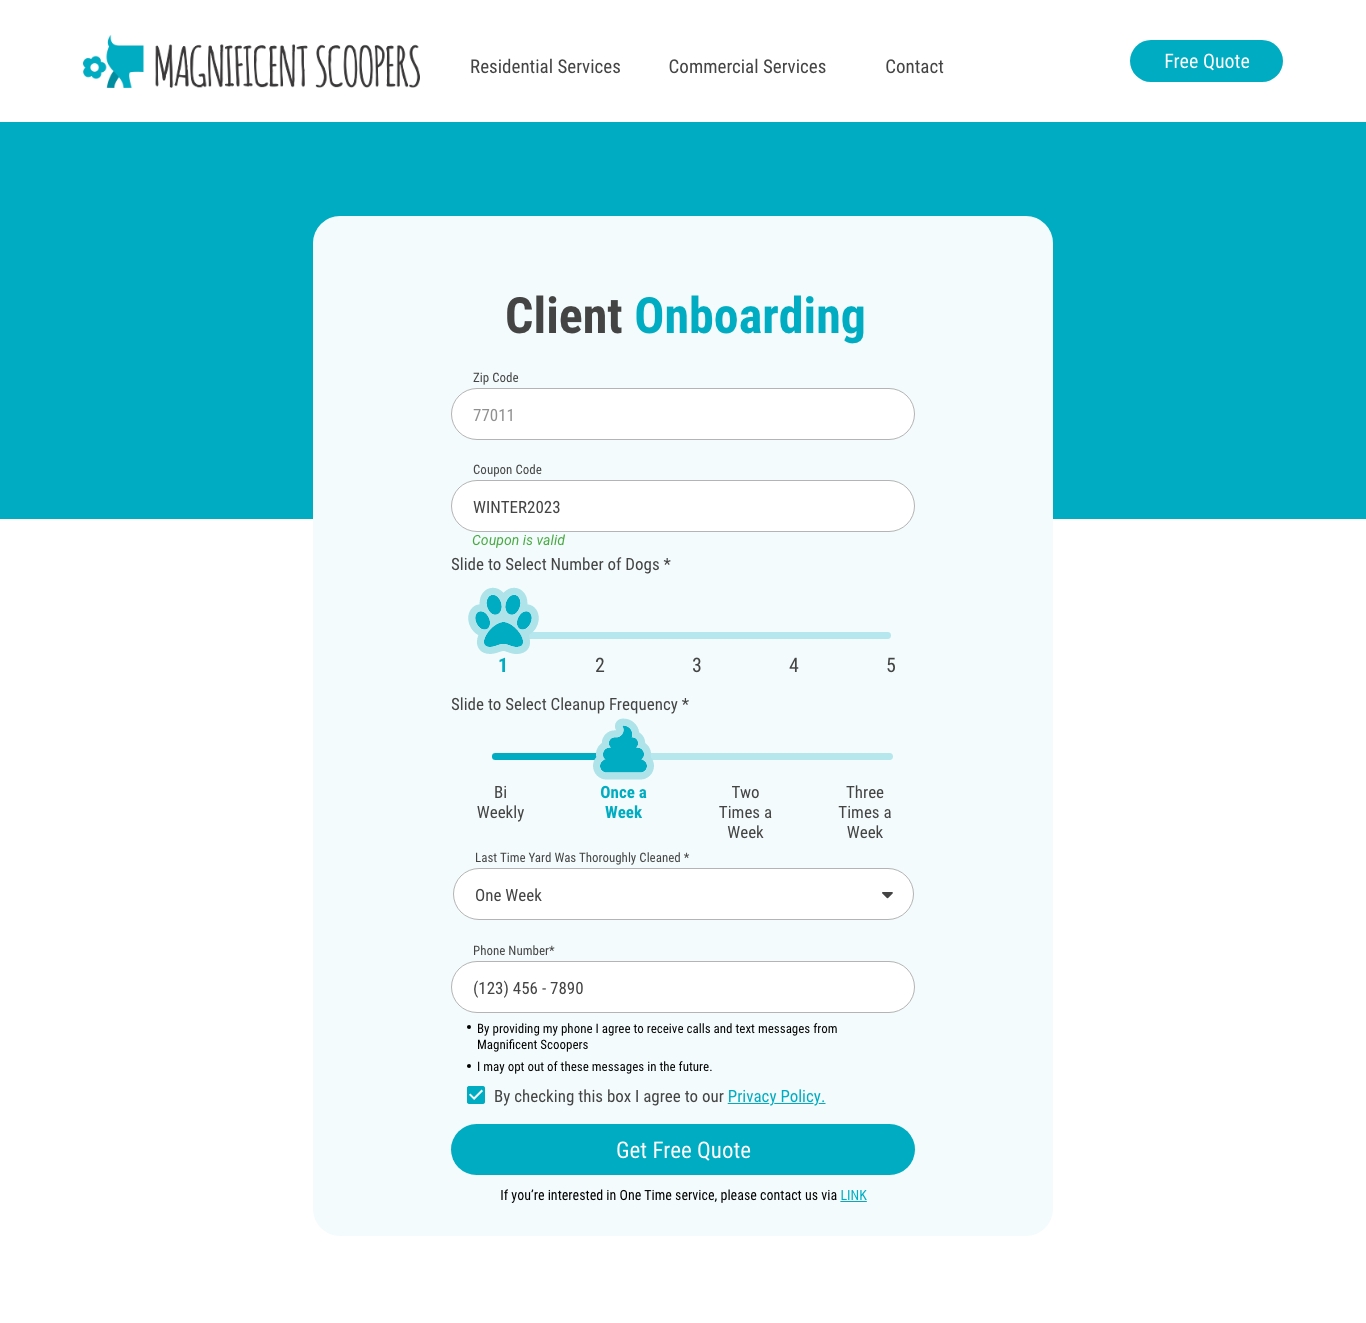
Design Preview
In this guide, we’re using our Scoop&Go theme and Elementor Page Builder for our WordPress website. The styling process is quite similar for other themes and builders.
Client Onboarding Form Styling – Initial Setup
As mentioned in the previous tutorial, after installing the plugin and adding the location, the initial step is to navigate to Client Onboarding > Setup. Ensure everything is configured there before proceeding to the next step, which is styling.
- Go to Client Onboarding > Setup tab
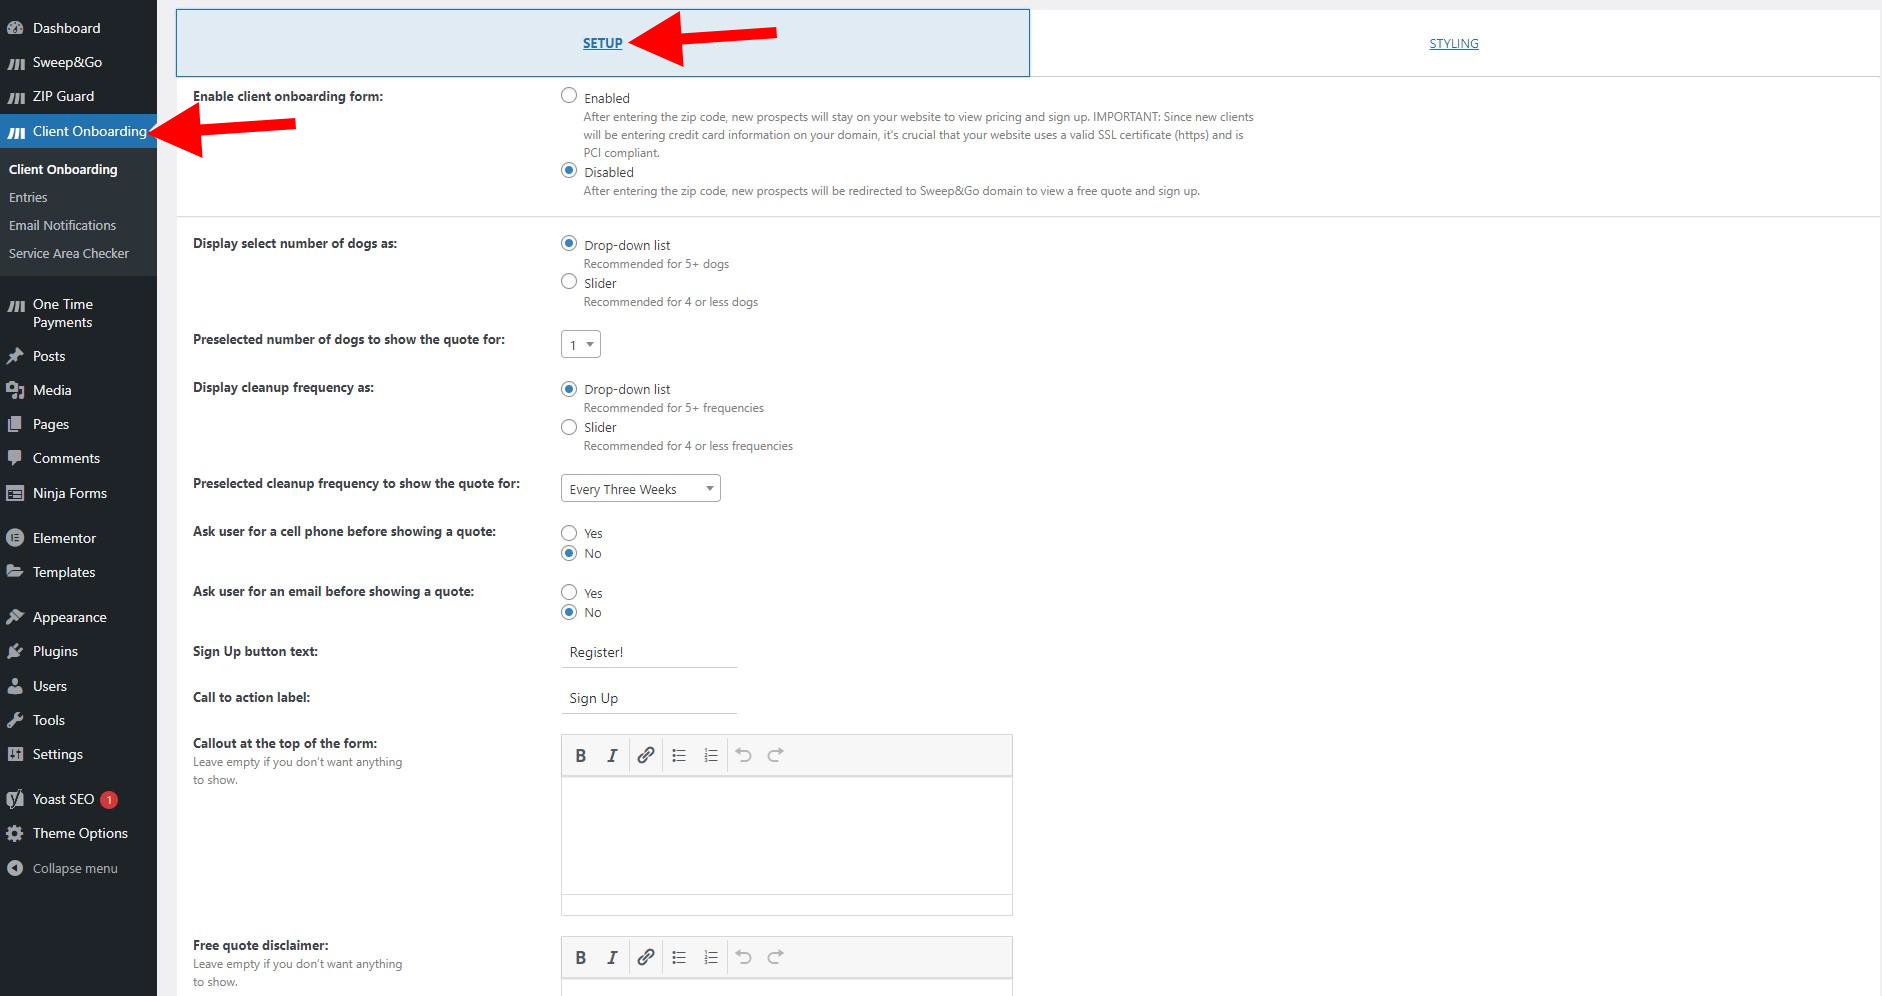
The initial preview of the setup tab
2. Next steps:
- Activate the client onboarding form
- Change “display select number of dogs as” to “Slider”
- Change “display cleanup frequency as” to “Slider”
After completing these, scroll down and hit “Save changes.”
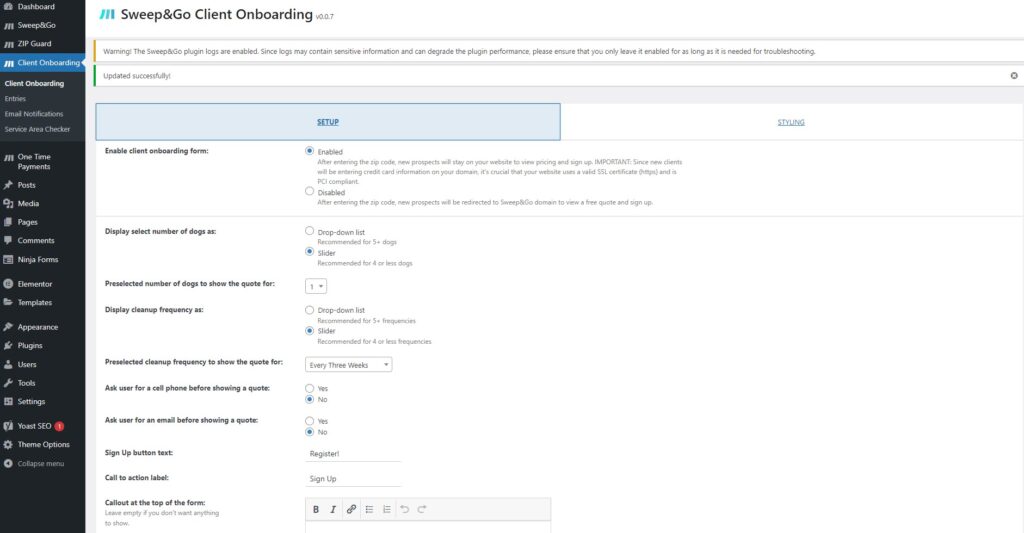
Preview after saving changes
3. With the design prepared, proceed as follows:
- Go to Client Onboarding > Styling tab.
- Upload icons for “Icon for number of dogs” and “Icon for clean up frequency”
- Save Changes
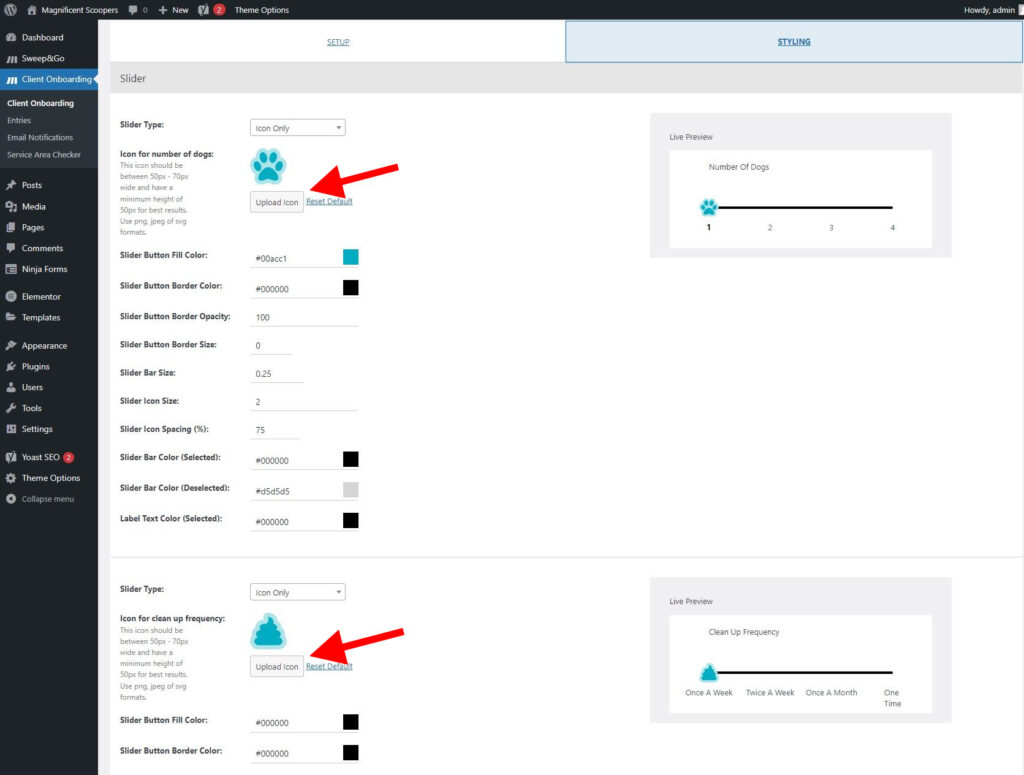
Upload the slider icons
4. The next step is to set up for both sliders:
- Slider bar size
- Slider icon size
- Slider bar color (selected)
- Slider bar color (deselected)
- Label text color (selected)
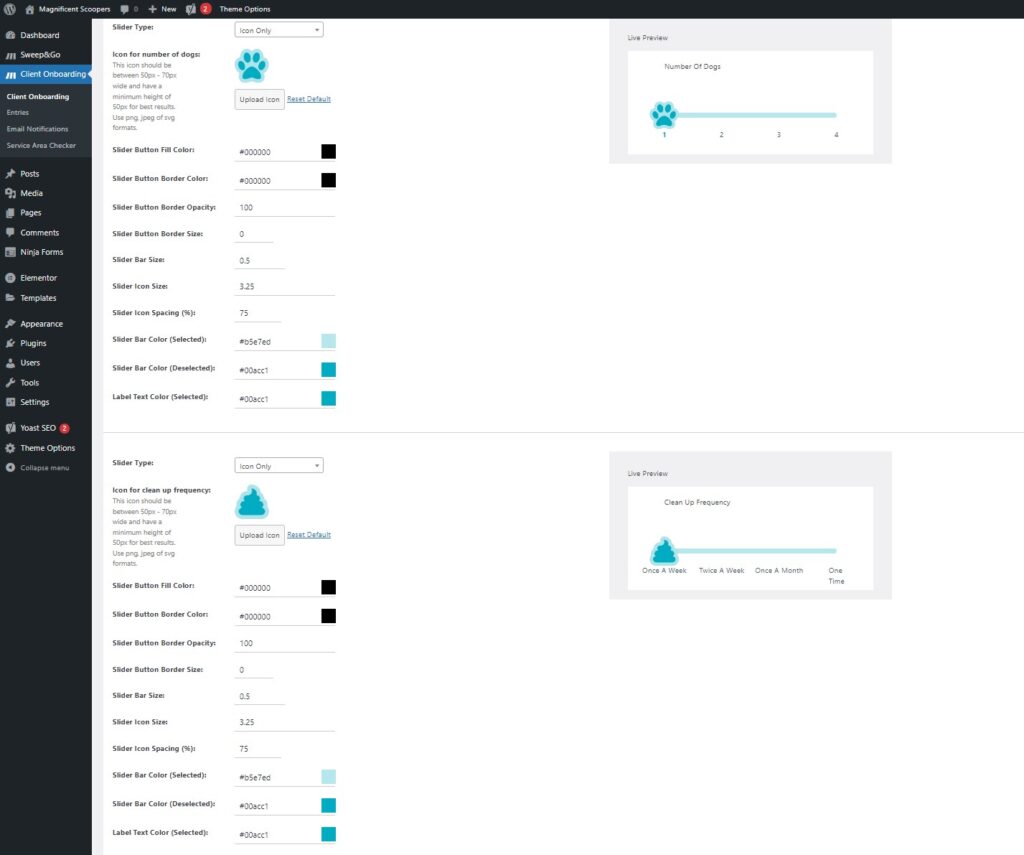
The exact sizes for the slider bar and icons are flexible. Feel free to experiment to find what works best.
5. The design features a blue background with part of the form overlapping it. We’ll guide you on how to create this effect:
- HTML code

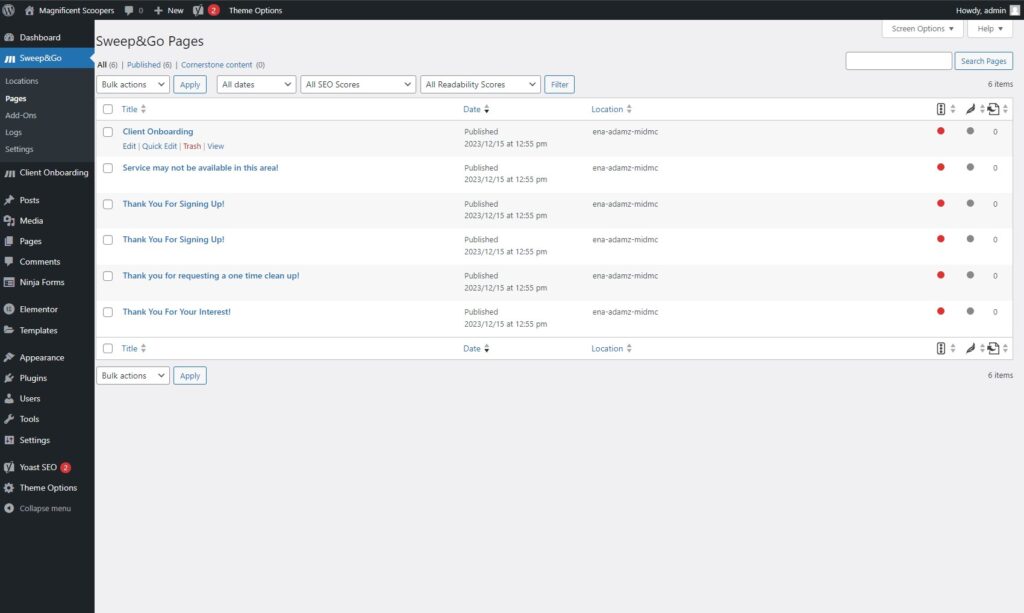
Please go to Sweep&Go > Pages > Client Onobarding and click on the “Edit” to edit the page:
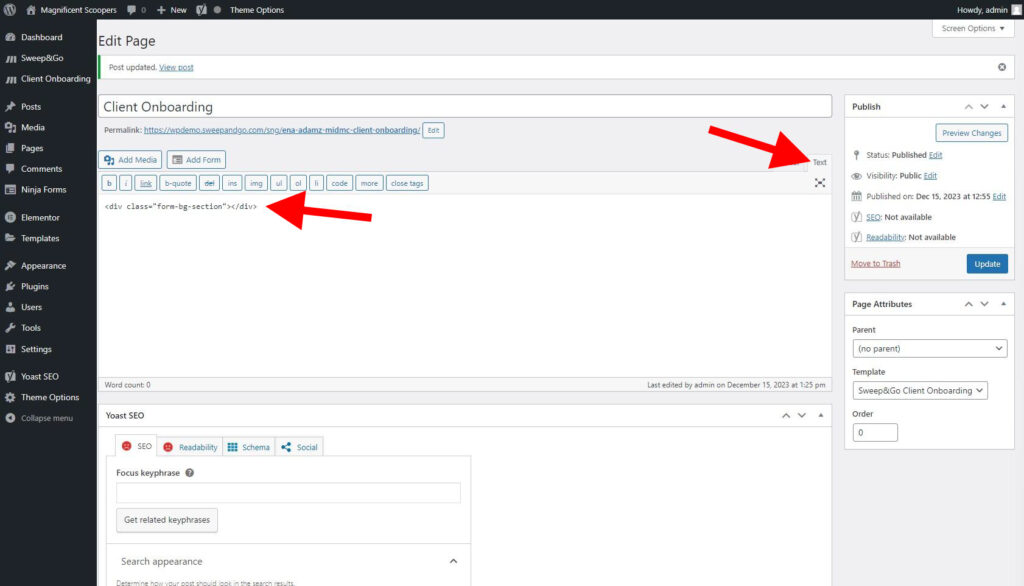
CLASSIC EDITOR:
In the text area switch to the “Text” tab so you can add the HTML code there:
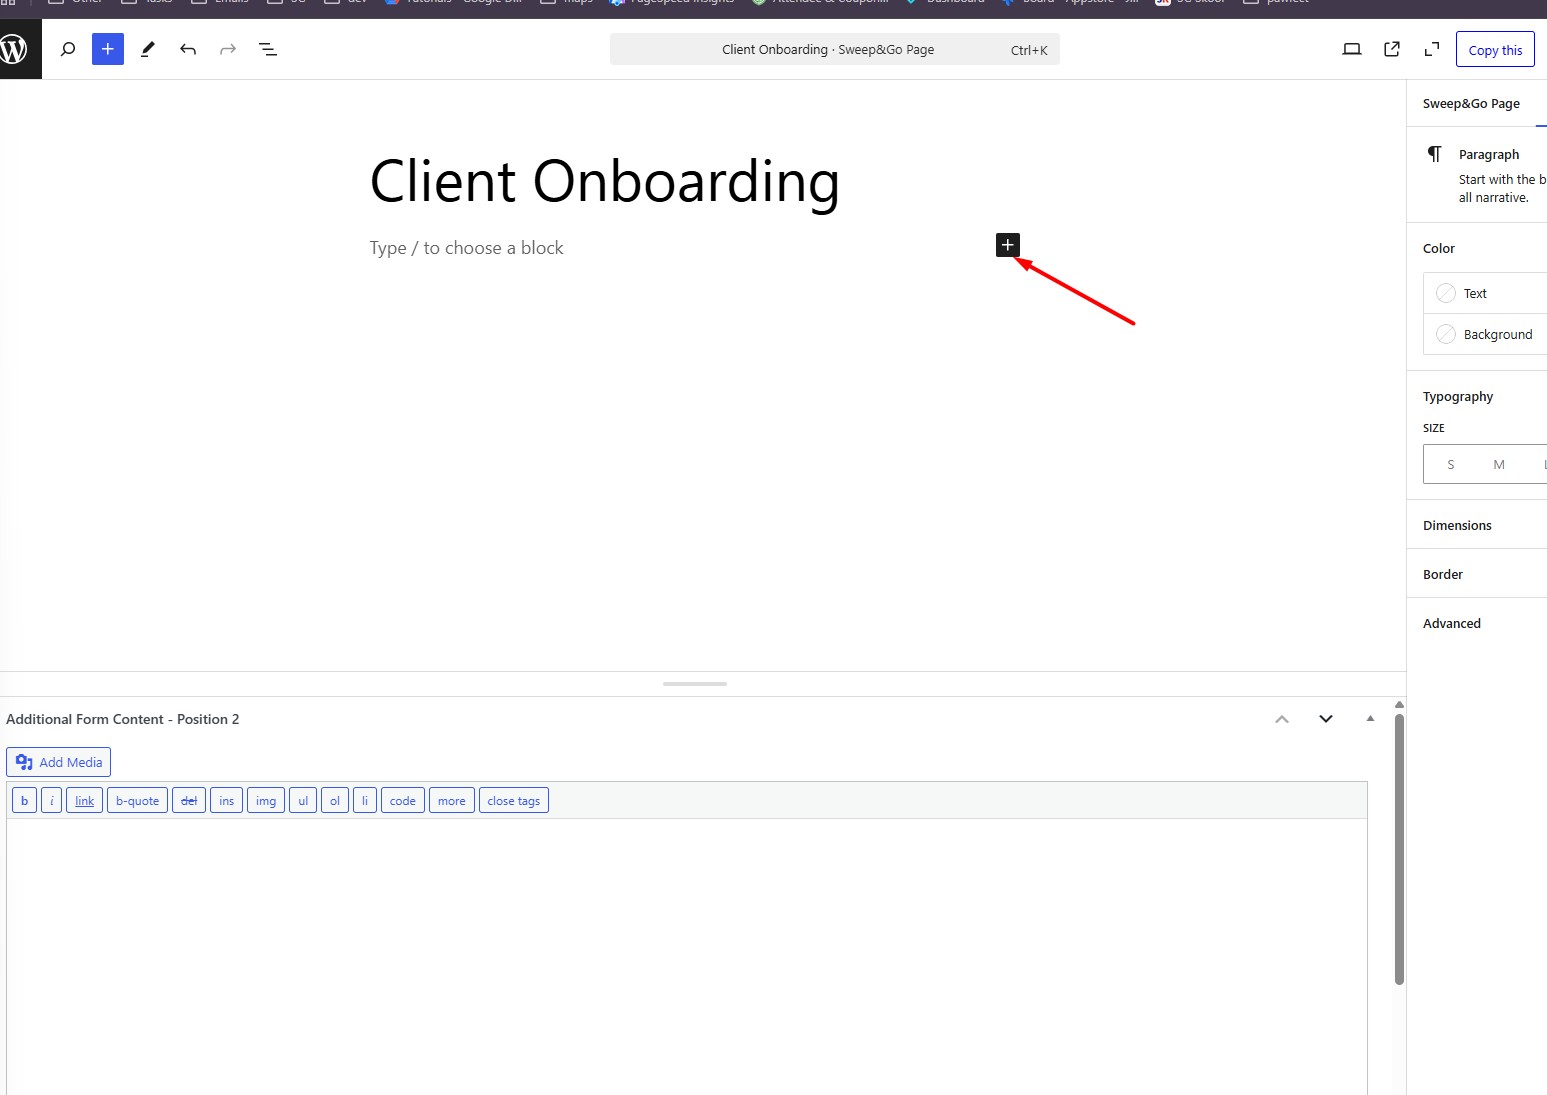
GUTENBERG EDITOR:
Step one: Click on the plus icon to add another element
GUTENBERG EDITOR:
Step two: Search for the HTML and click on the “Custom HTML”
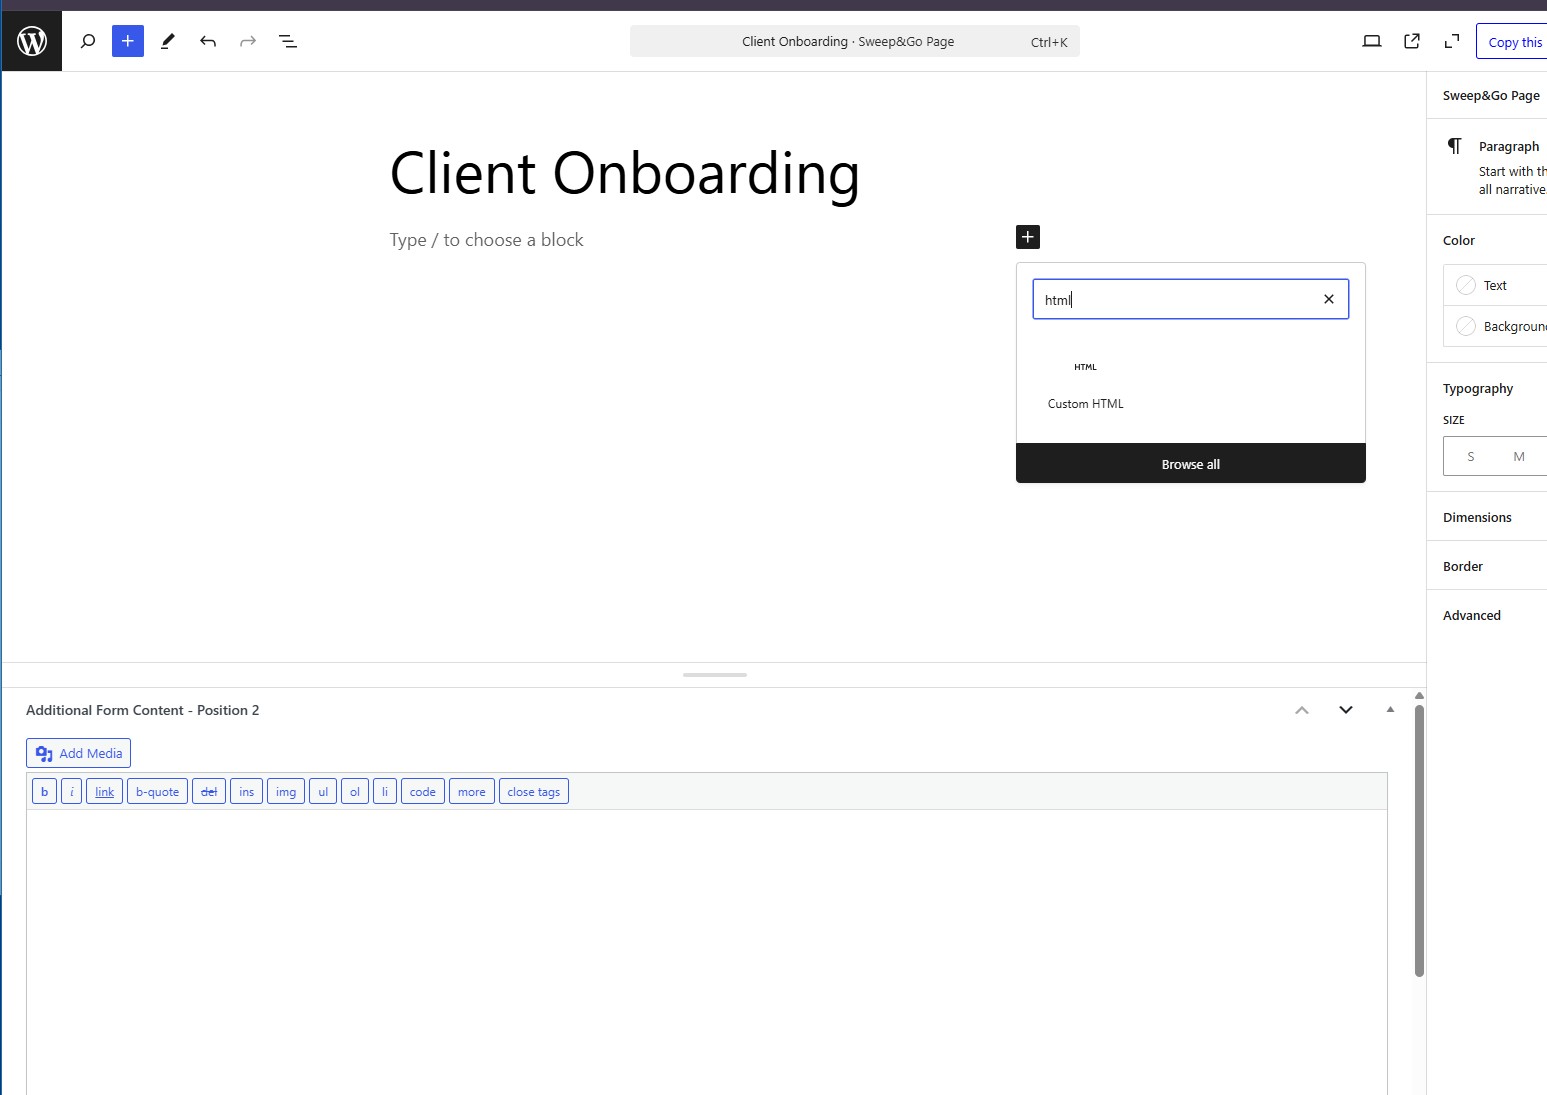
GUTENBERG EDITOR:
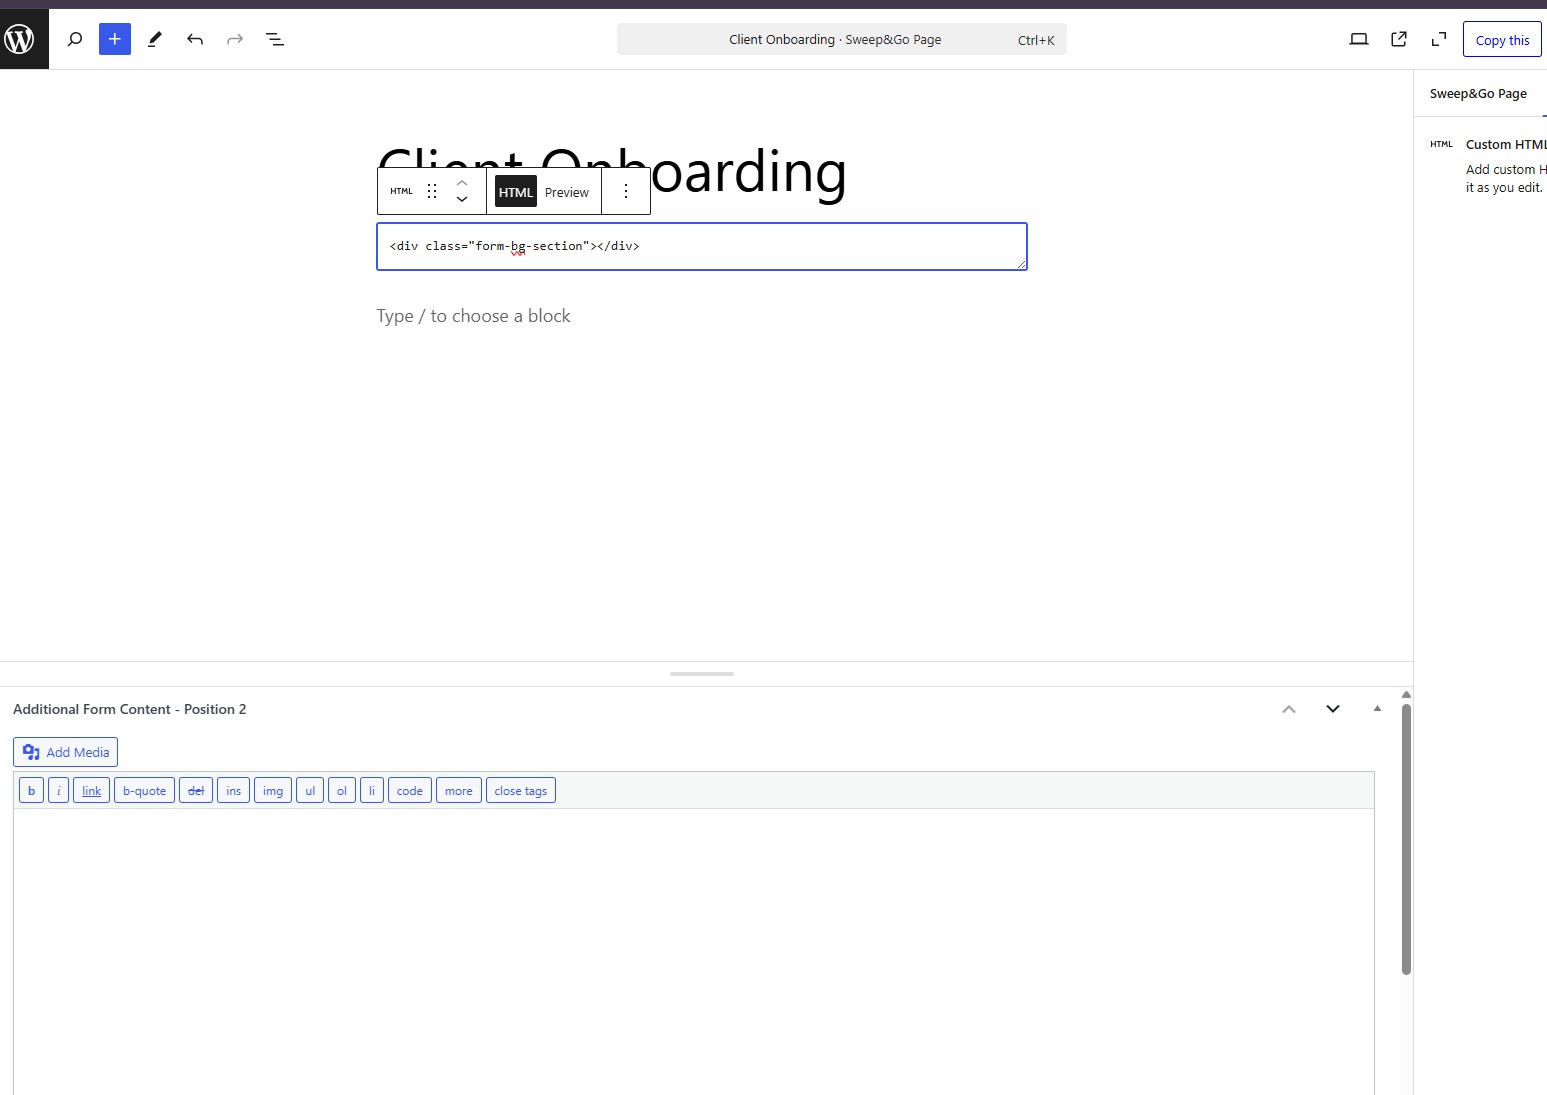
Step three: You may add the HTML
<div class=”form-bg-section”></div>
The HTML elements that we targeted in this step and designed are:
- CSS class: form–bg-section
- CSS class: content-area
- CSS class: type-sng-page
- CSS class: page-header
- CSS class: entry-title
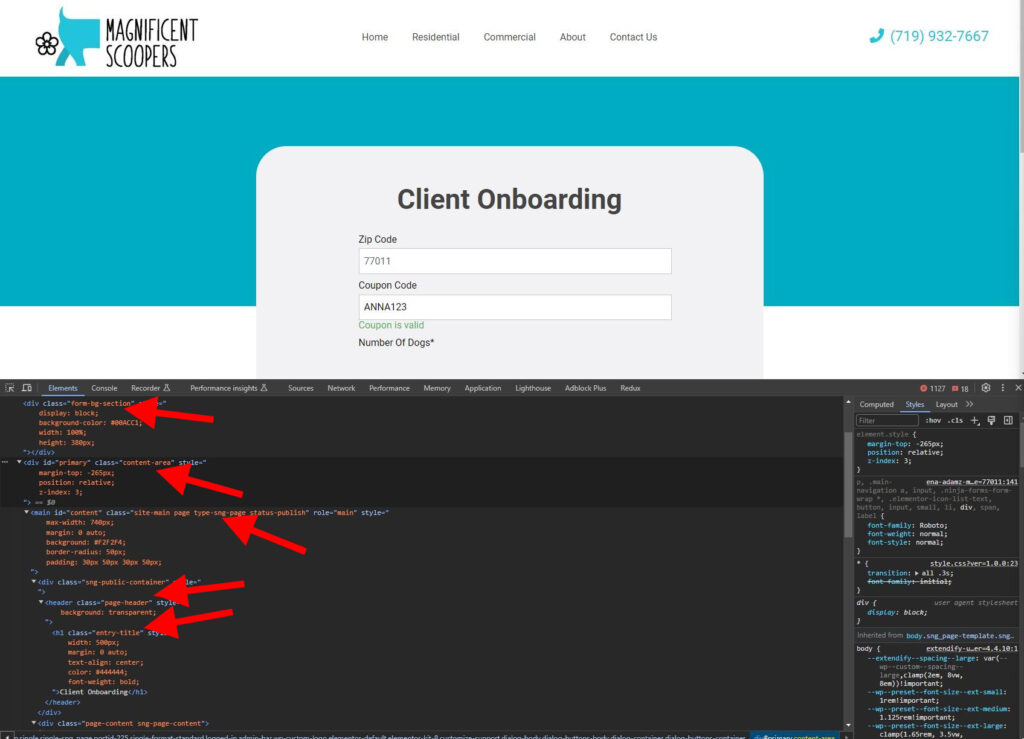
Next, navigate to either the child theme or “Appearance > Customizer > Additional CSS” to save your CSS. To specifically style the “Client Onboarding” page, use the following CSS:
body.sng_page-template-sng-client-onboarding-template-php .form-bg-section {
     display: block;
     background-color: #00ACC1;
     width: 100%;
     height: 380px;
}
body.sng_page-template-sng-client-onboarding-template-php .form-bg-section {
     display: block;
     background-color: #00ACC1;
     width: 100%;
     height: 380px;
}
body.sng_page-template-sng-client-onboarding-template-php .content-area {
     margin-top: -265px;
     position: relative;
     z-index: 3;
}
body.sng_page-template-sng-client-onboarding-template-php .content-area .type-sng-page {
     max-width: 740px;
     margin: 0 auto 40px;
     background: #F3FBFC;
     border-radius: 27px;
     padding: 30px 50px
}
6. In this step, we want to style the form title as on the design:

First, return to the WordPress dashboard. Navigate to Sweep&Go > Pages > Client Onboarding. Wrap “Onboarding” in a tag and save the changes.
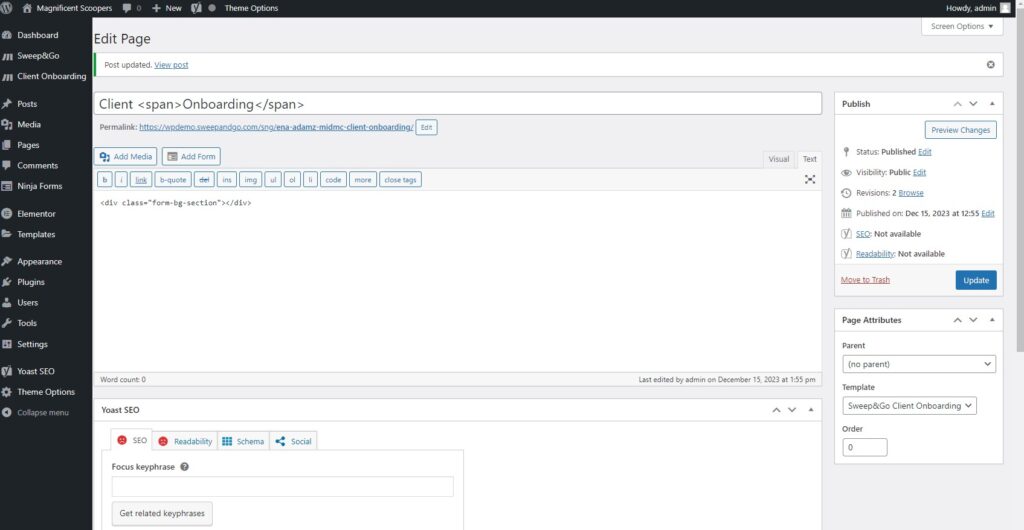
Next, switch to the frontend and target the tag to view the changes:
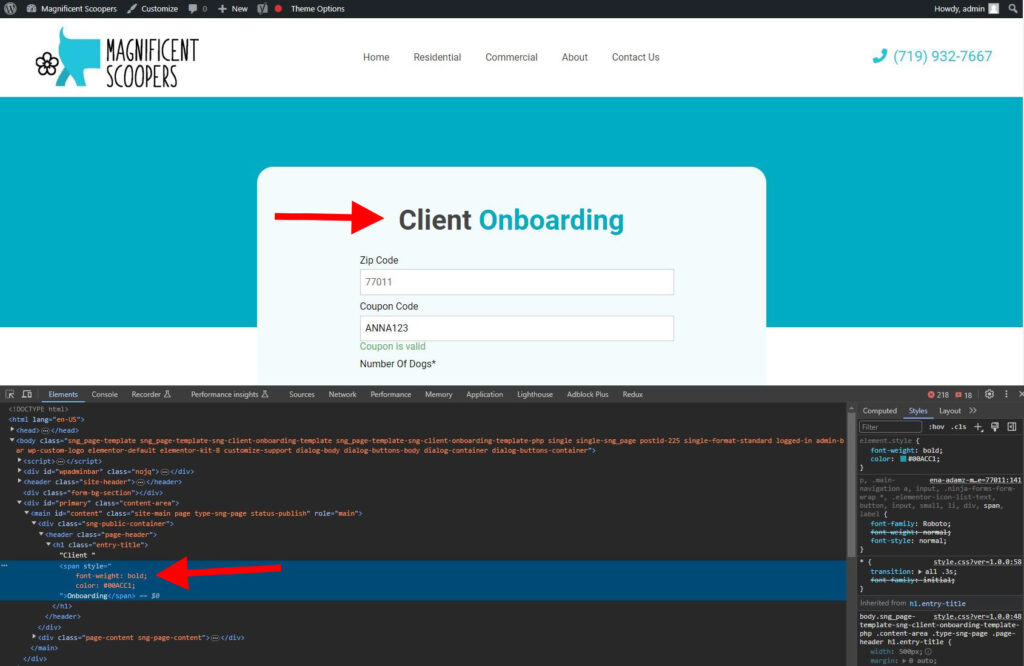
Don’t forget to save these CSS changes in your theme!
body.sng_page-template-sng-client-onboarding-template-php .content-area .type-sng-page .page-header h1.entry-title span {
     font-weight: bold; color: #00ACC1;
}
7. Our focus is going to be styling the:
- Labels
- Input fields
- Adjusting the gap between the slider and label above (Number Of Dogs* and Cleanup Frequency*)
- Dropdown
- Get Free Quote button
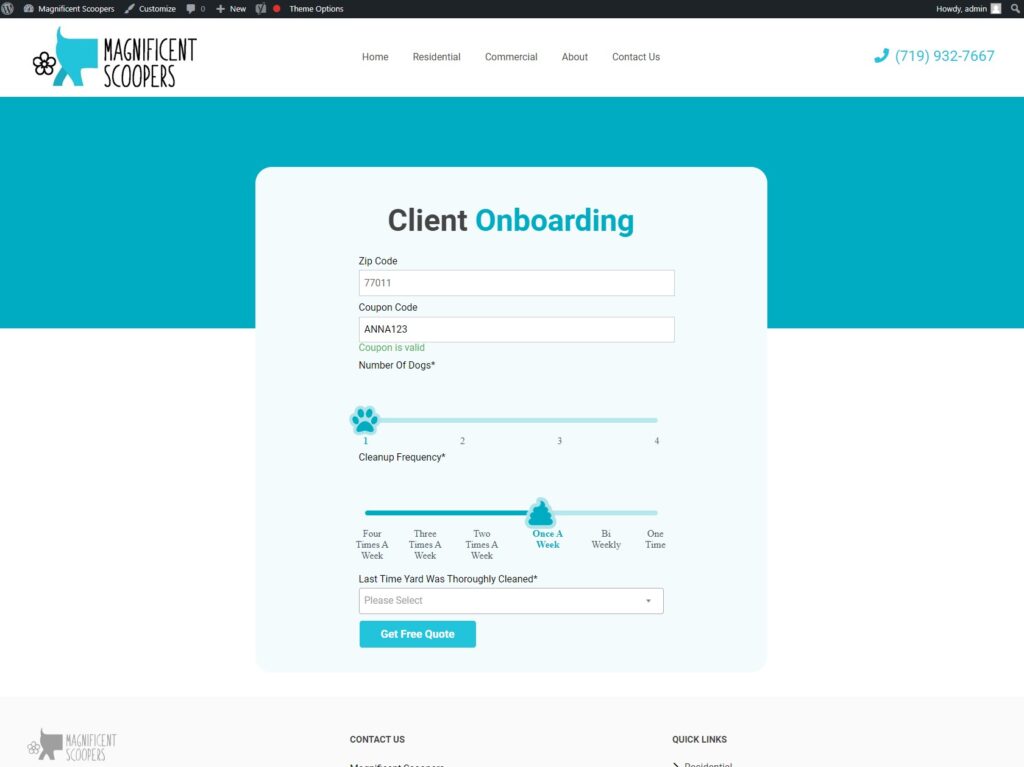
Preview before making those adjustments
Just for quick reference, this is what our CSS for the input field looks like:
form#client_onboarding_form input[type="text"] {
     border-radius: 50px;
     font-size: 17px;
     padding: 10px 20px;
     color: #444444;
}
CSS for the Number of dogs slider:
.sng-div-number-of-dogs {
     margin-top: 2.5rem!important;
     margin-bottom: 4rem!important;
}
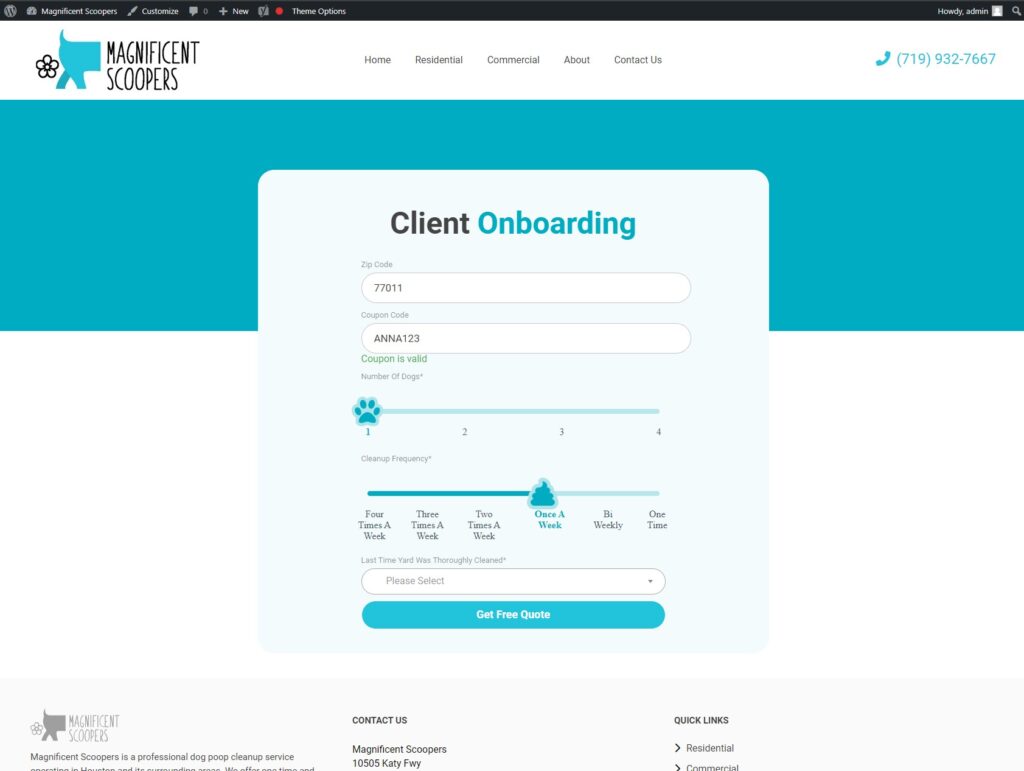
Preview after making CSS adjustments
8. After choosing “Last Time Yard Was Thoroughly Cleaned” and clicking “Get Free Quote,” the form will expand. Let’s style this expanded section now:
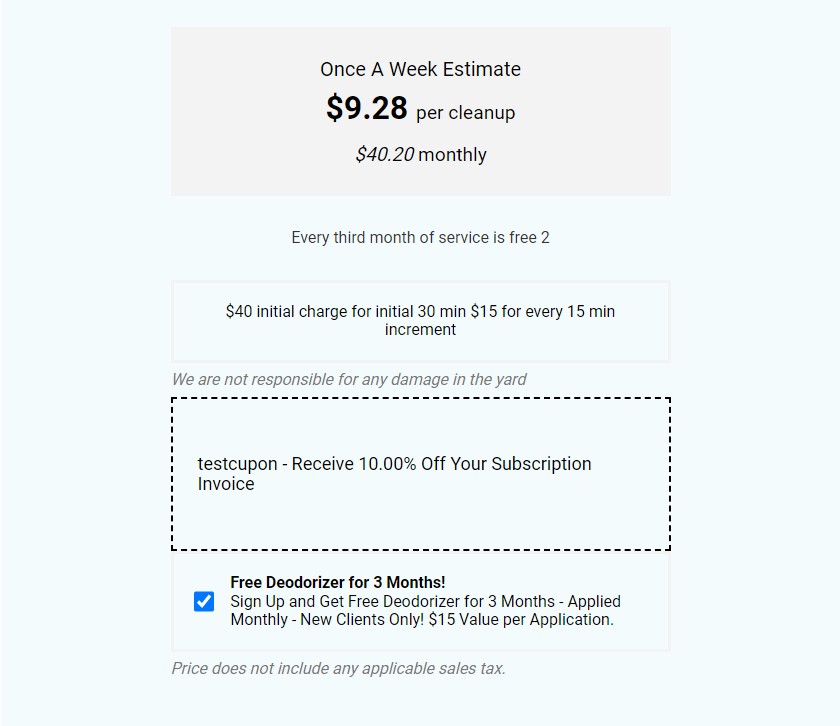
Preview before making any CSS changes
Most CSS modifications occur within the DIV having the class “sng-pricing-table”.
Here’s an example of the CSS for the initial estimate section:
.sng-pricing-table #sng-initial-estimate {
     background: #F3FBFC;
     max-width: 80%;
     width: 100%;
     margin: 0 auto;
     border-radius: 0px;
     color: #444;
     border: none;
     font-size: 18px;
     padding: 20px 30px;
}
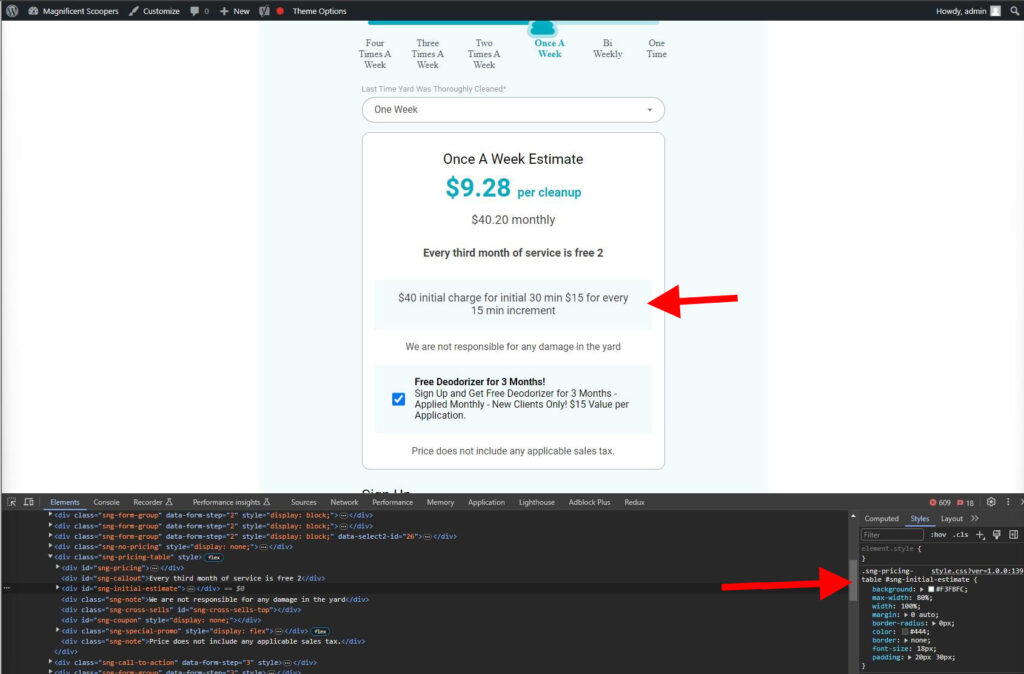
Preview before making any CSS changes
9. If your zip code checker looks like this, it means your theme doesn’t include styling for the default HTML input and button elements

Preview of default zip code checker without styling
We’ll show you how to identify those elements and style them properly. You can also use our default styling from the tutorial and customize it to your needs—or share it with your designer so they can assist you.
We use a main wrapper class for the zip code checker, and it should be styled like this:
.sng-zip-code {
  display: flex;
  position: relative;
  gap: 10px;
}
Inside the zip code checker, we have an input field, a button, and a DIV with the class .is-label-invalid, which displays an error message if the user tries to submit the form without entering a zip code.
.sng-zip-code input[type="text"] {
  line-height: 1.7;
  background-color: #fff;
  border: 1px solid #c9c9c9;
  outline: none;
  height: auto;
  display: block;
  width: fit-content;
  border-radius: 0;
  padding: 15px 15px;
  font-size: 16px;
  color: #202020;
}

.sng-zip-code button {
  background-color: #7985f0;
  font-size: 16px;
  font-weight: 700;
  line-height: 18px;
  letter-spacing: 0.64px;
  color: #fff;
  padding: 20px 35px 15px 35px;
  outline: none;
  border: none;
}

.sng-zip-code .is-label-invalid {
  position: absolute;
  width: fit-content;
  top: calc(100% + 5px);
  background: #b00020;
  color: #fff !important;
  padding: 10px;
  border-radius: 0;
  font-size: 14px;
  z-index: 1;
}
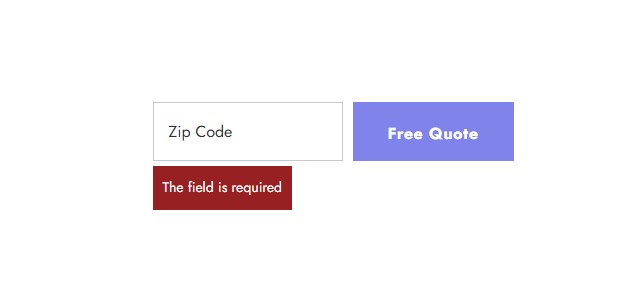
Preview of default zip code checker with style
It’s also important to make sure the layout looks good on mobile devices. You can add this media query to adjust the layout on smaller screens:
@media only screen and (max-width: 768px) {
  .sng-zip-code {
    flex-direction: column;
  }
}
We recommend testing how these changes appear on mobile devices as well. Don’t forget to check this.
If you have any questions, please contact us: https://www.sweepandgo.com/contact/