In this tutorial, we’ll walk you through the installation of this plugin into your WordPress website.
We will guide you through the installation process, demonstrating how to install the plugin on your website effectively. Additionally, our tutorial will cover how to publish the zip code checker on one or multiple pages of your website, ensuring maximum visibility and accessibility for your clients.
Table of contents
Prerequisites:
Before you begin :
- Go to App store and order Sweep&Go Core plugin and Client Onboarding plugin (they are free of charge and require Sweep&Go POOfessional plan)
- Download the zip file you’ll receive in the email after purchasing the plugins
- Have a designer design how your onboarding experience will look like after implementation (icons, colors, etc).
- Create staging environment – we recommend setting and testing a plugin there first
- Delete the old version of the plugin in case you have already installed
- Sweep and Go Client Onboarding (Version: 0.6.2)
- Sweep&Go Client Onboarding (Version: 1.0.0)
Initial Installation Instructions:
Please follow the instructions step by step:
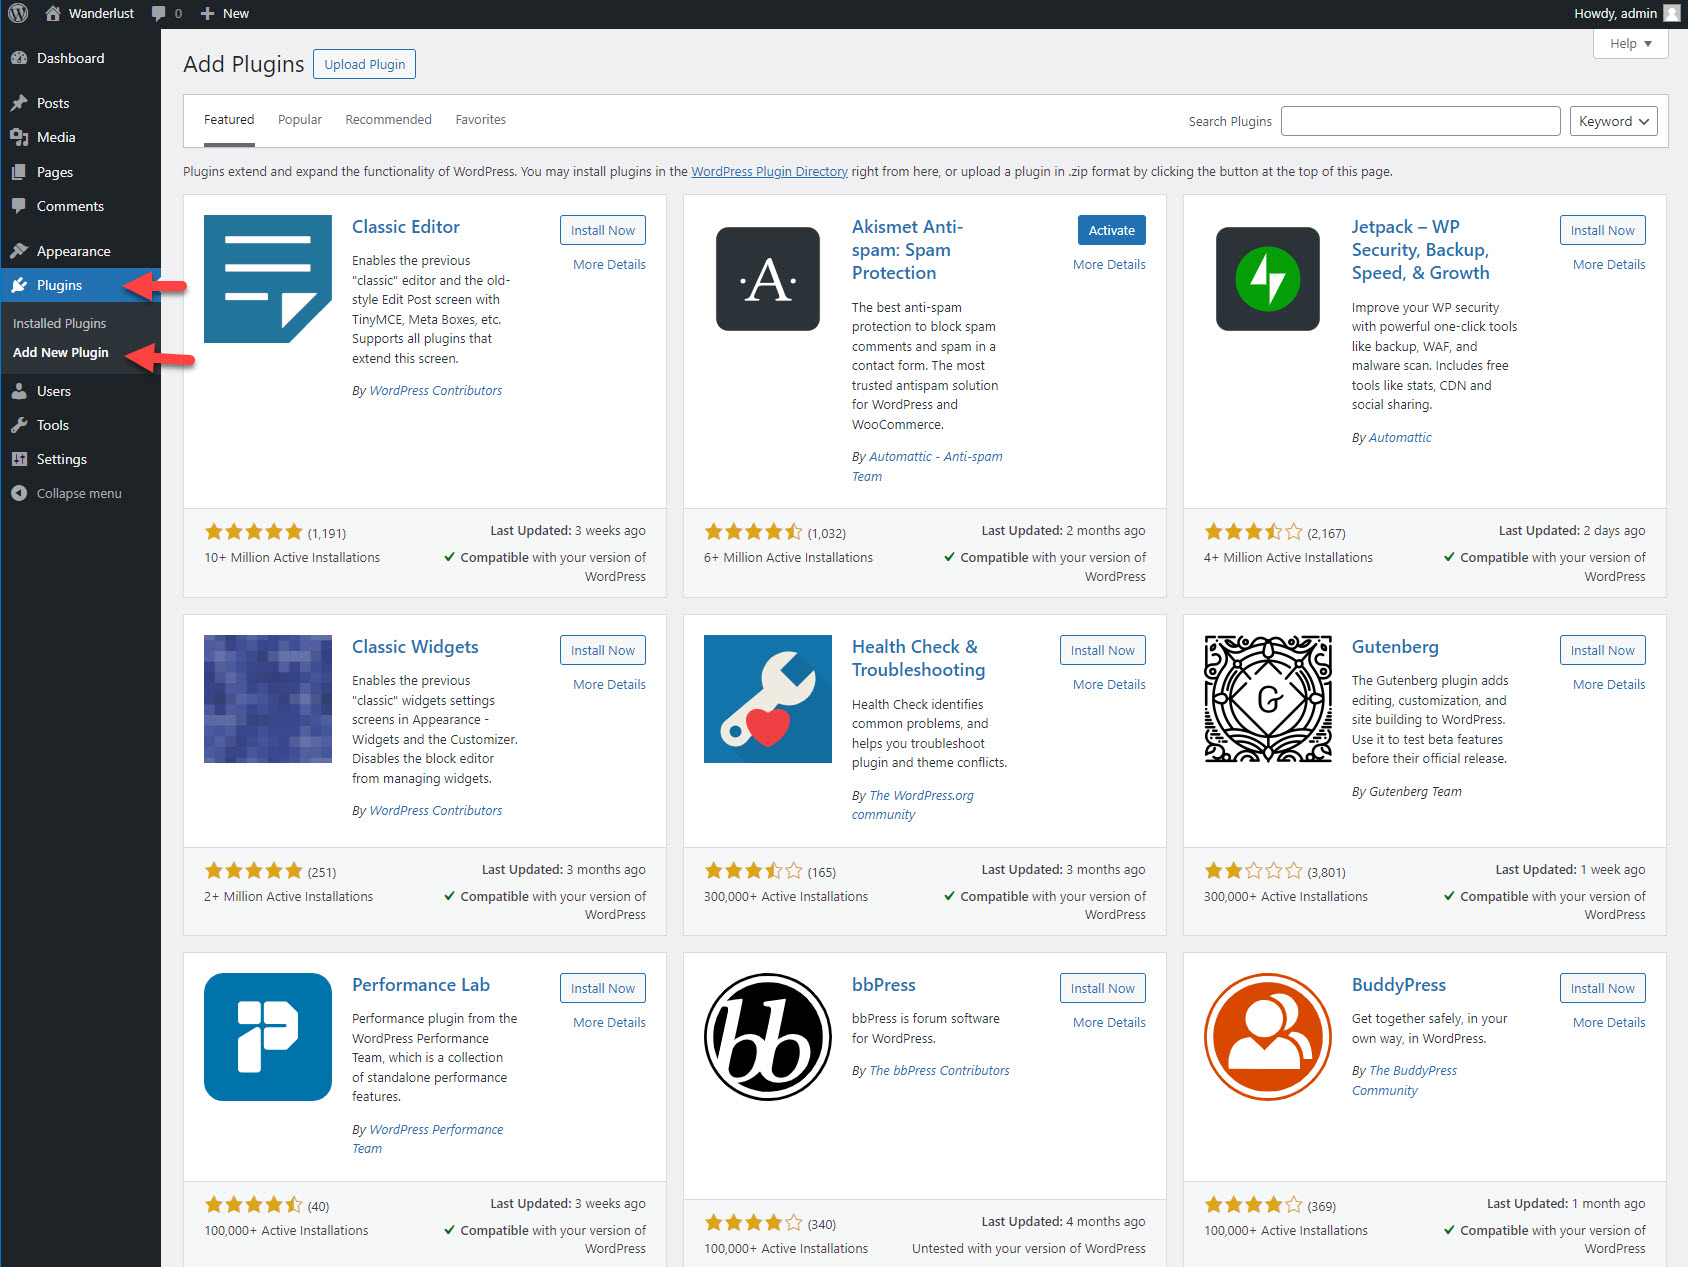
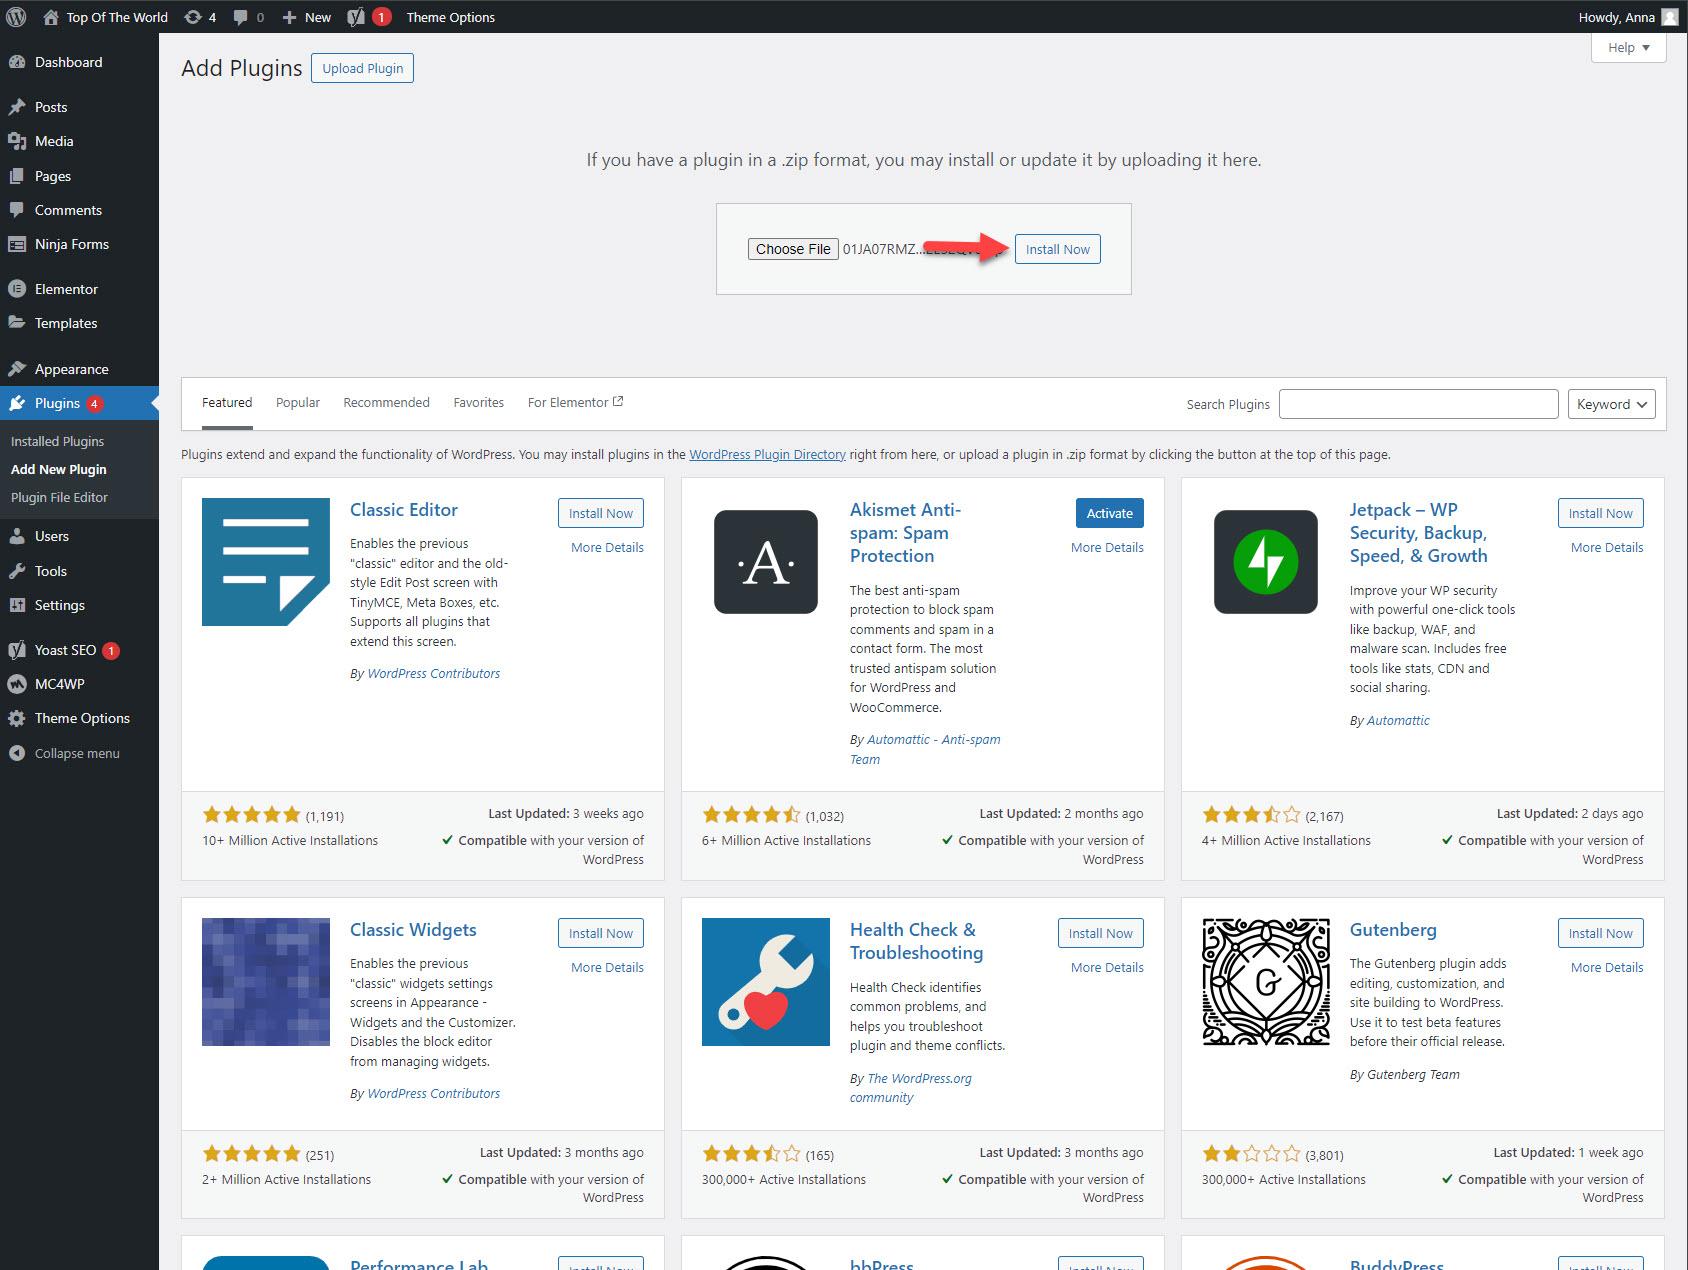
- Go to the WordPress dashboard and on the left sidebar, find “Plugins” and click “Add New Plugin”:
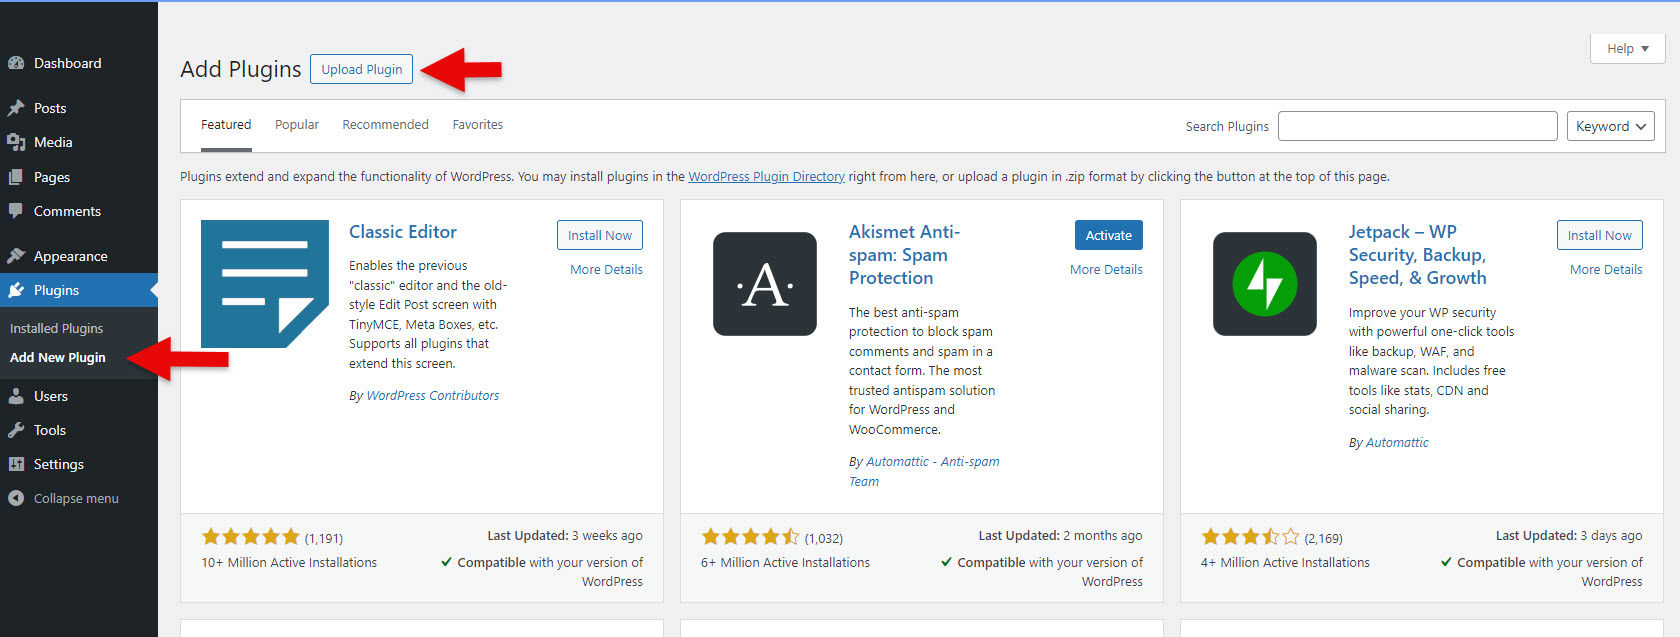
2. Click “Upload Plugin” to upload the plugin you just downloaded
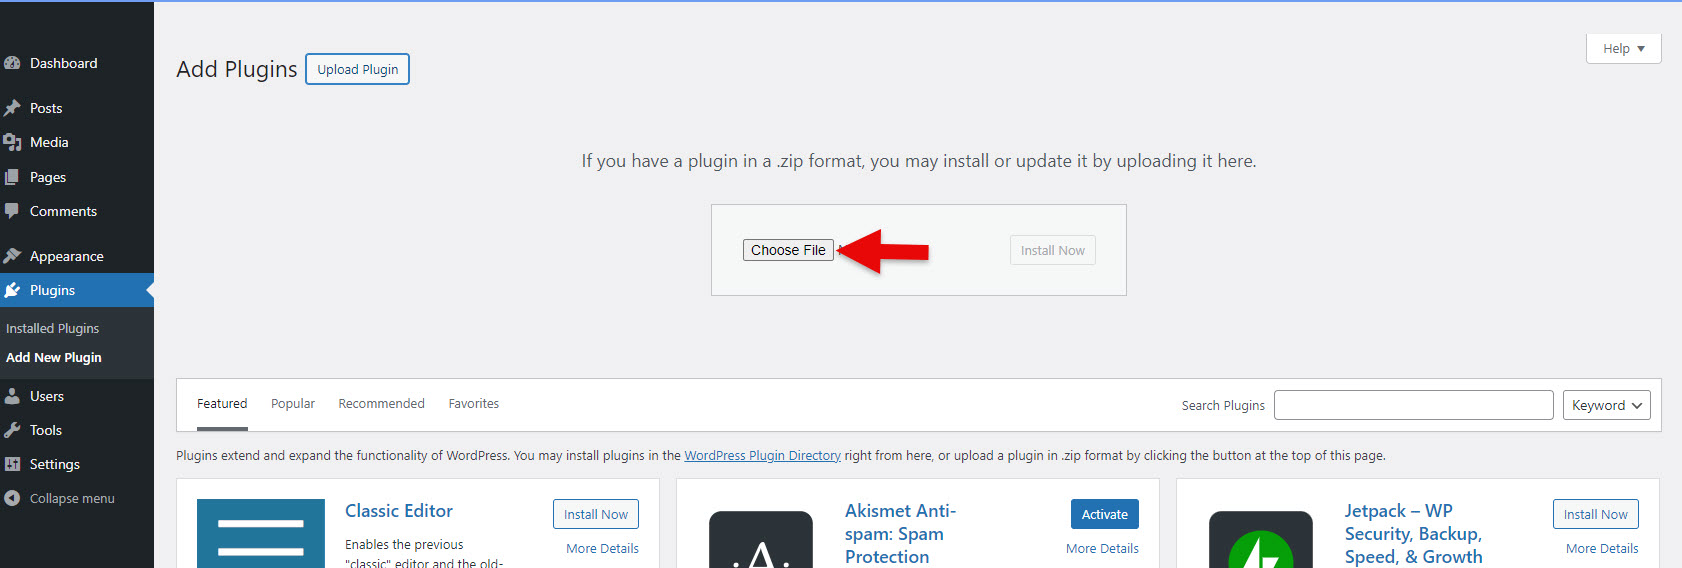
3. Click “Choose File”
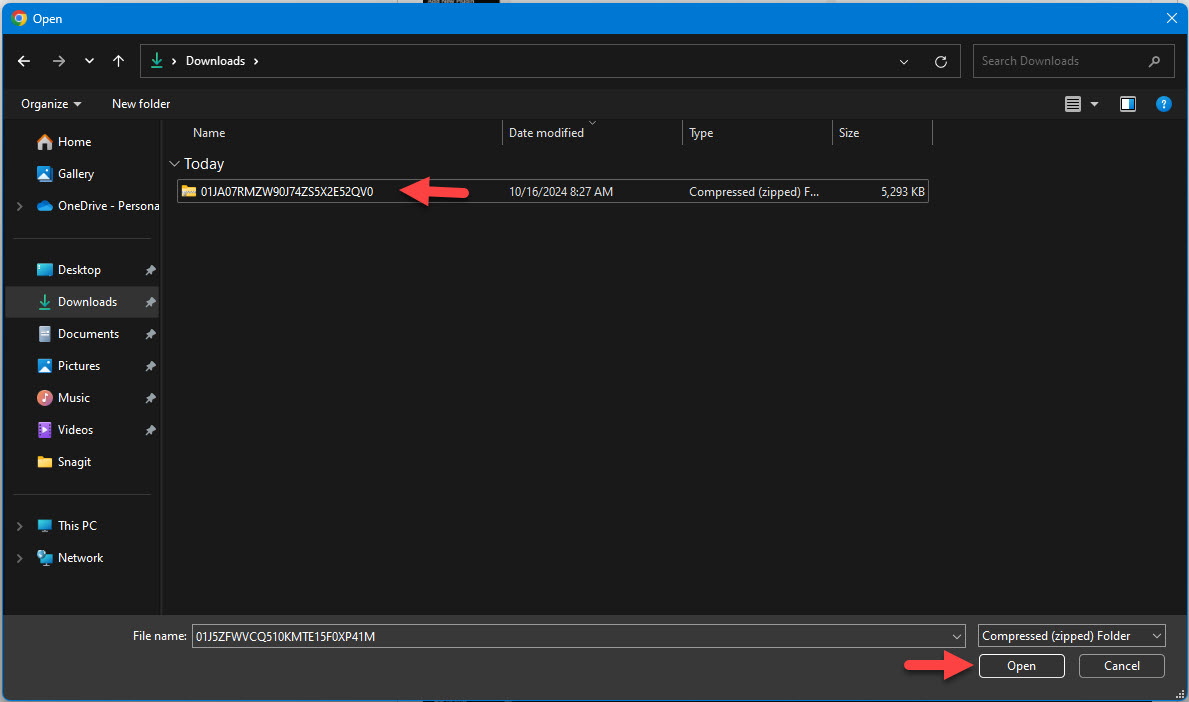
4. Find the plugin’s zip folder (you received it in the email after purchasing the plugins) and select it
5. Click “Install Now”
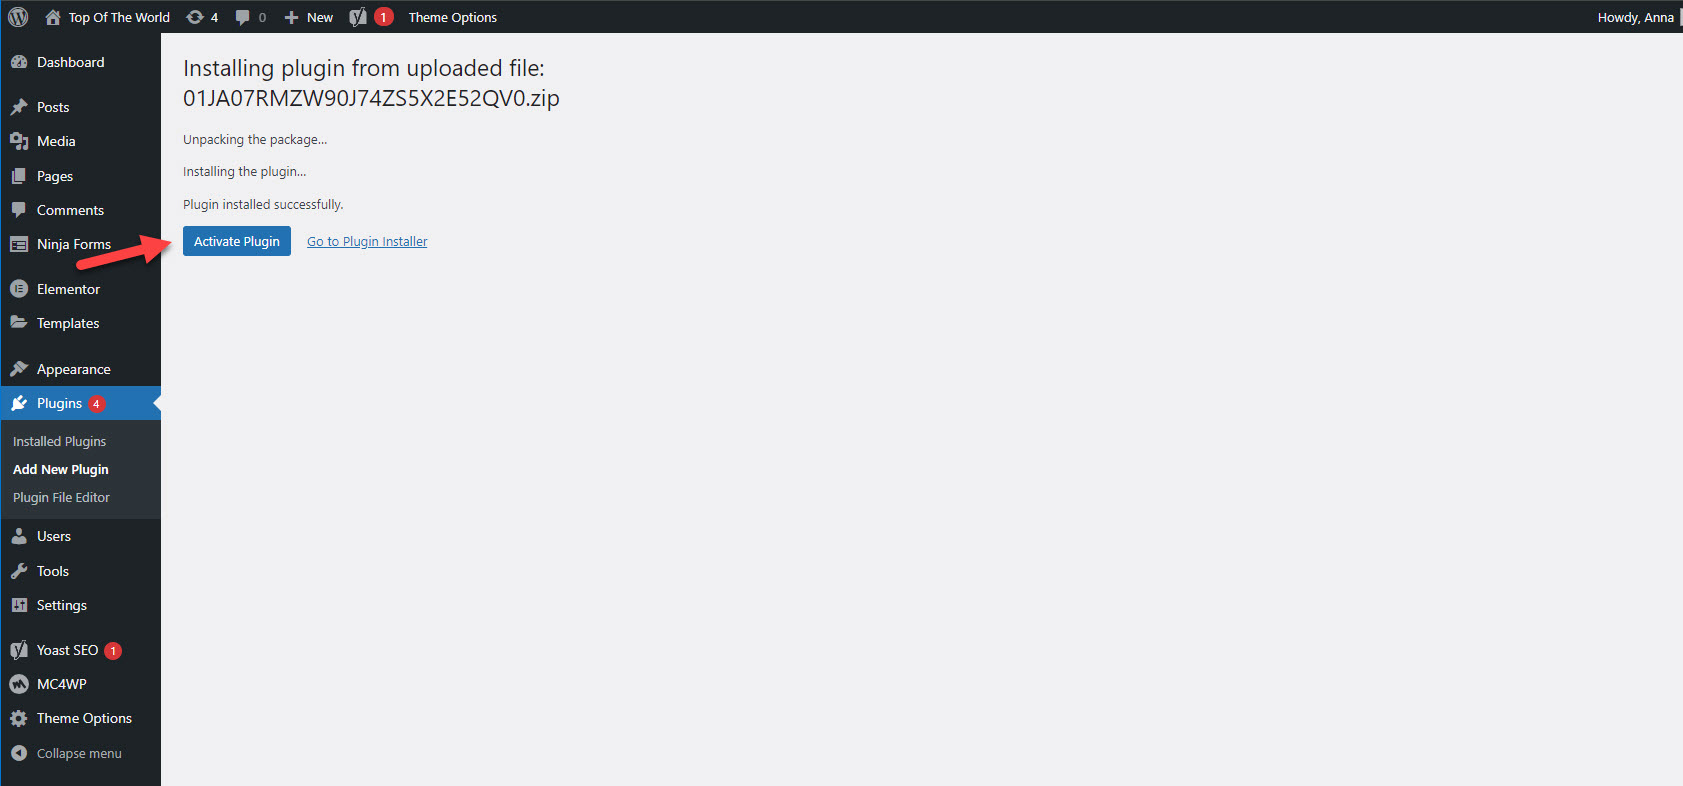
6. Click “Activate Plugin”
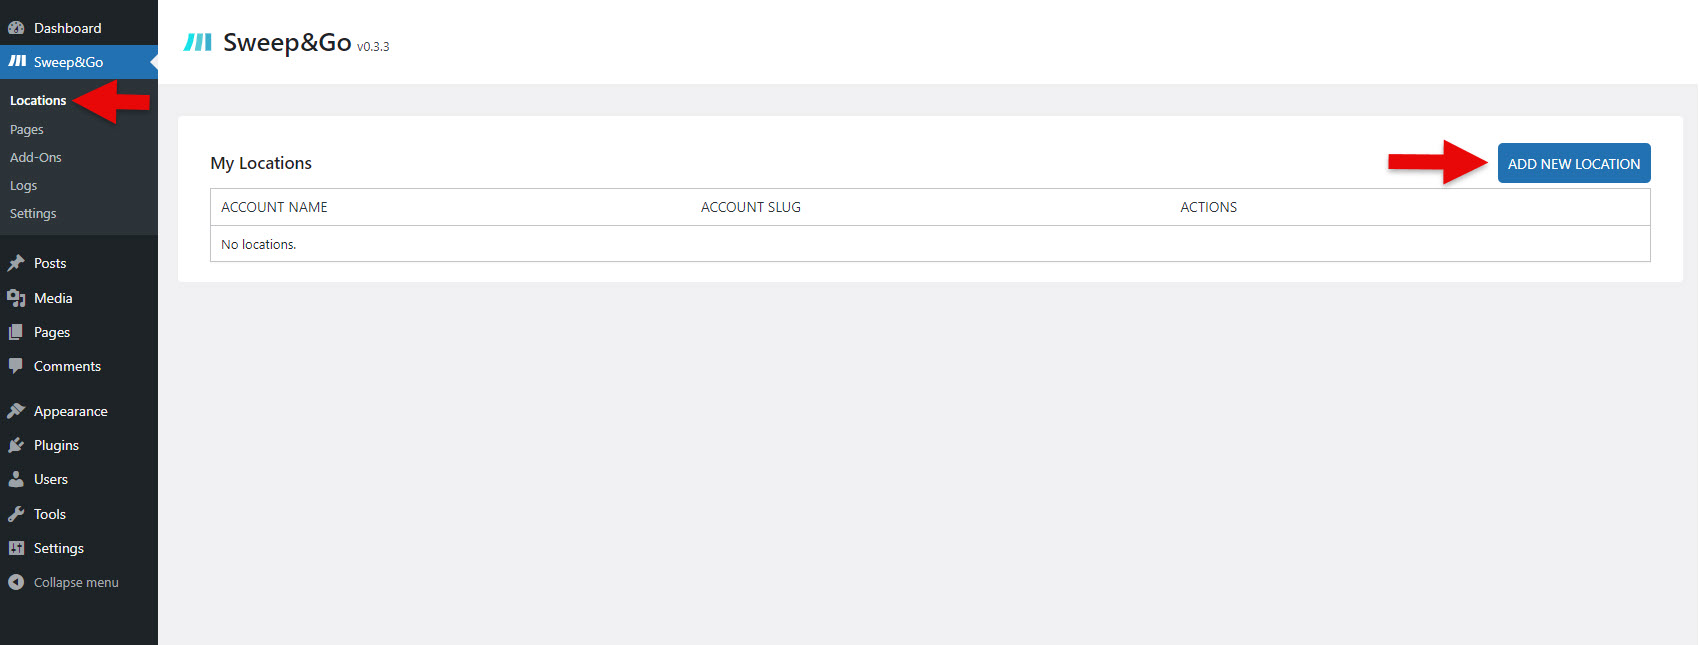
7. After the plugin activation on your left sidebar go to “Sweep&Go” and click “Locations”

8. Click the “Add New Location” button
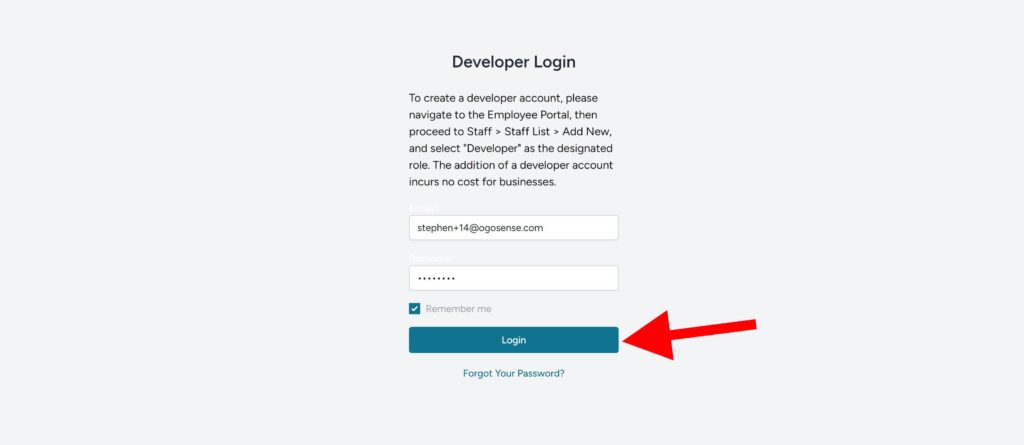
9. After clicking the button you will be redirected to the Open API developer login. To log in you need to create a developer’s account.
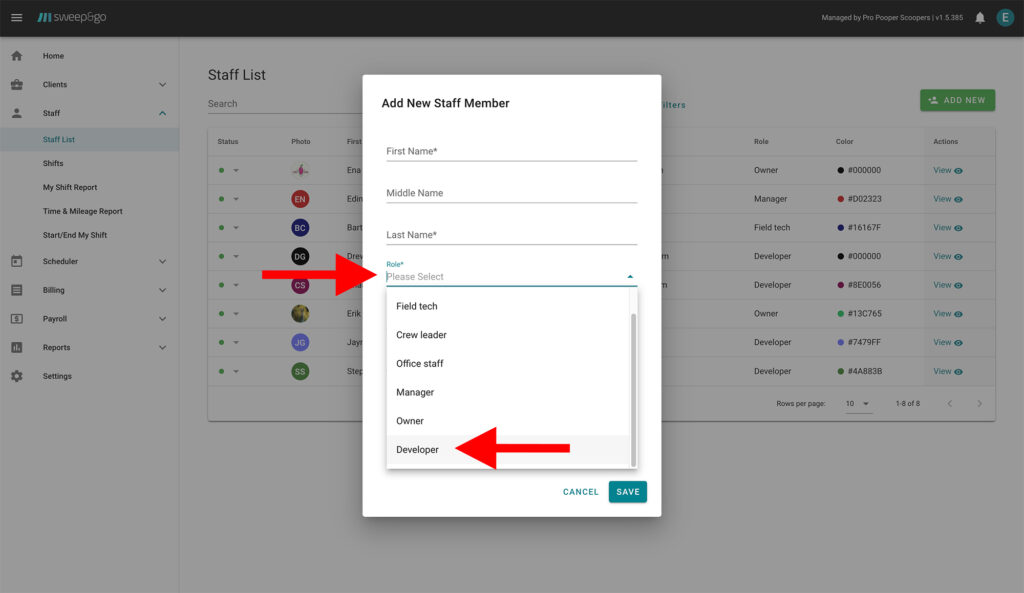
10. You should receive the email with login credentials for the Open API. Use those credentials to log in:
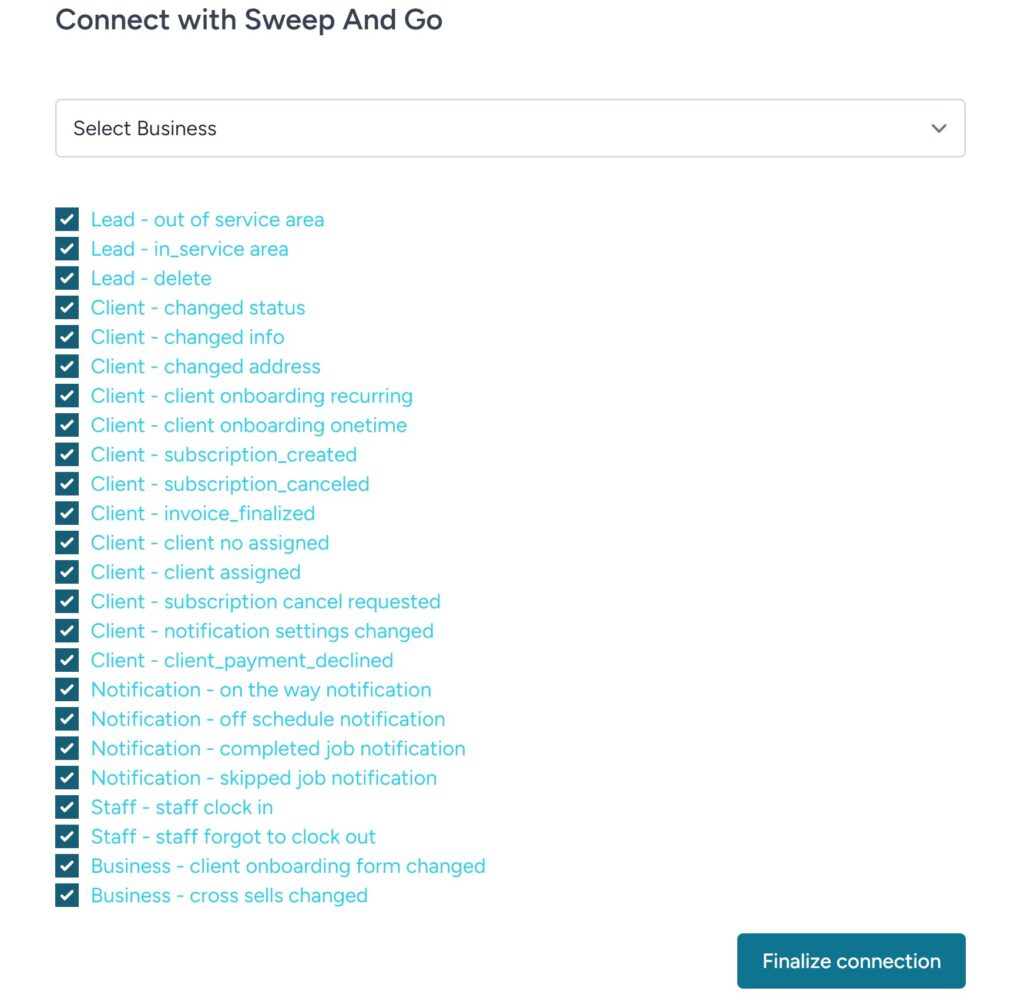
11. Select business from the dropdown list and click “Finalize connection”
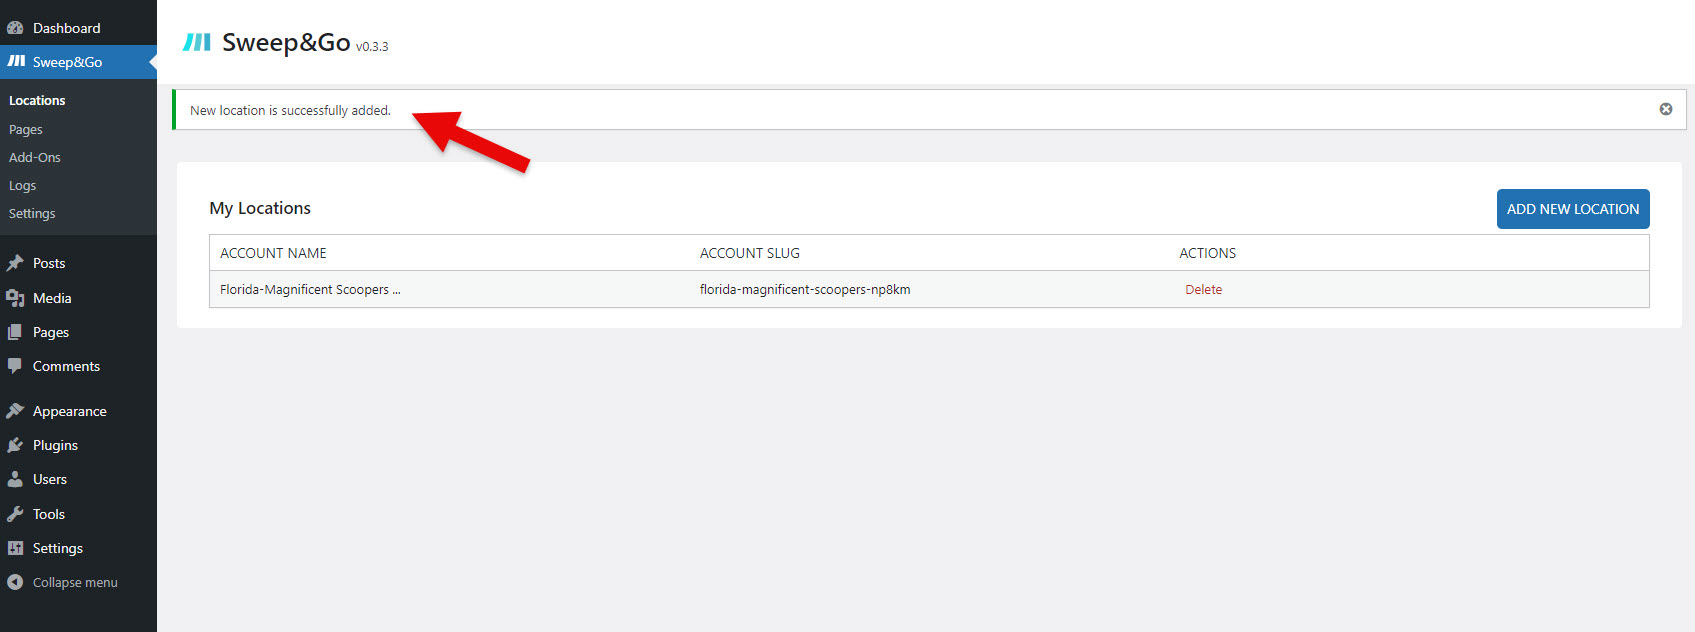
12. A new location will be successfully added
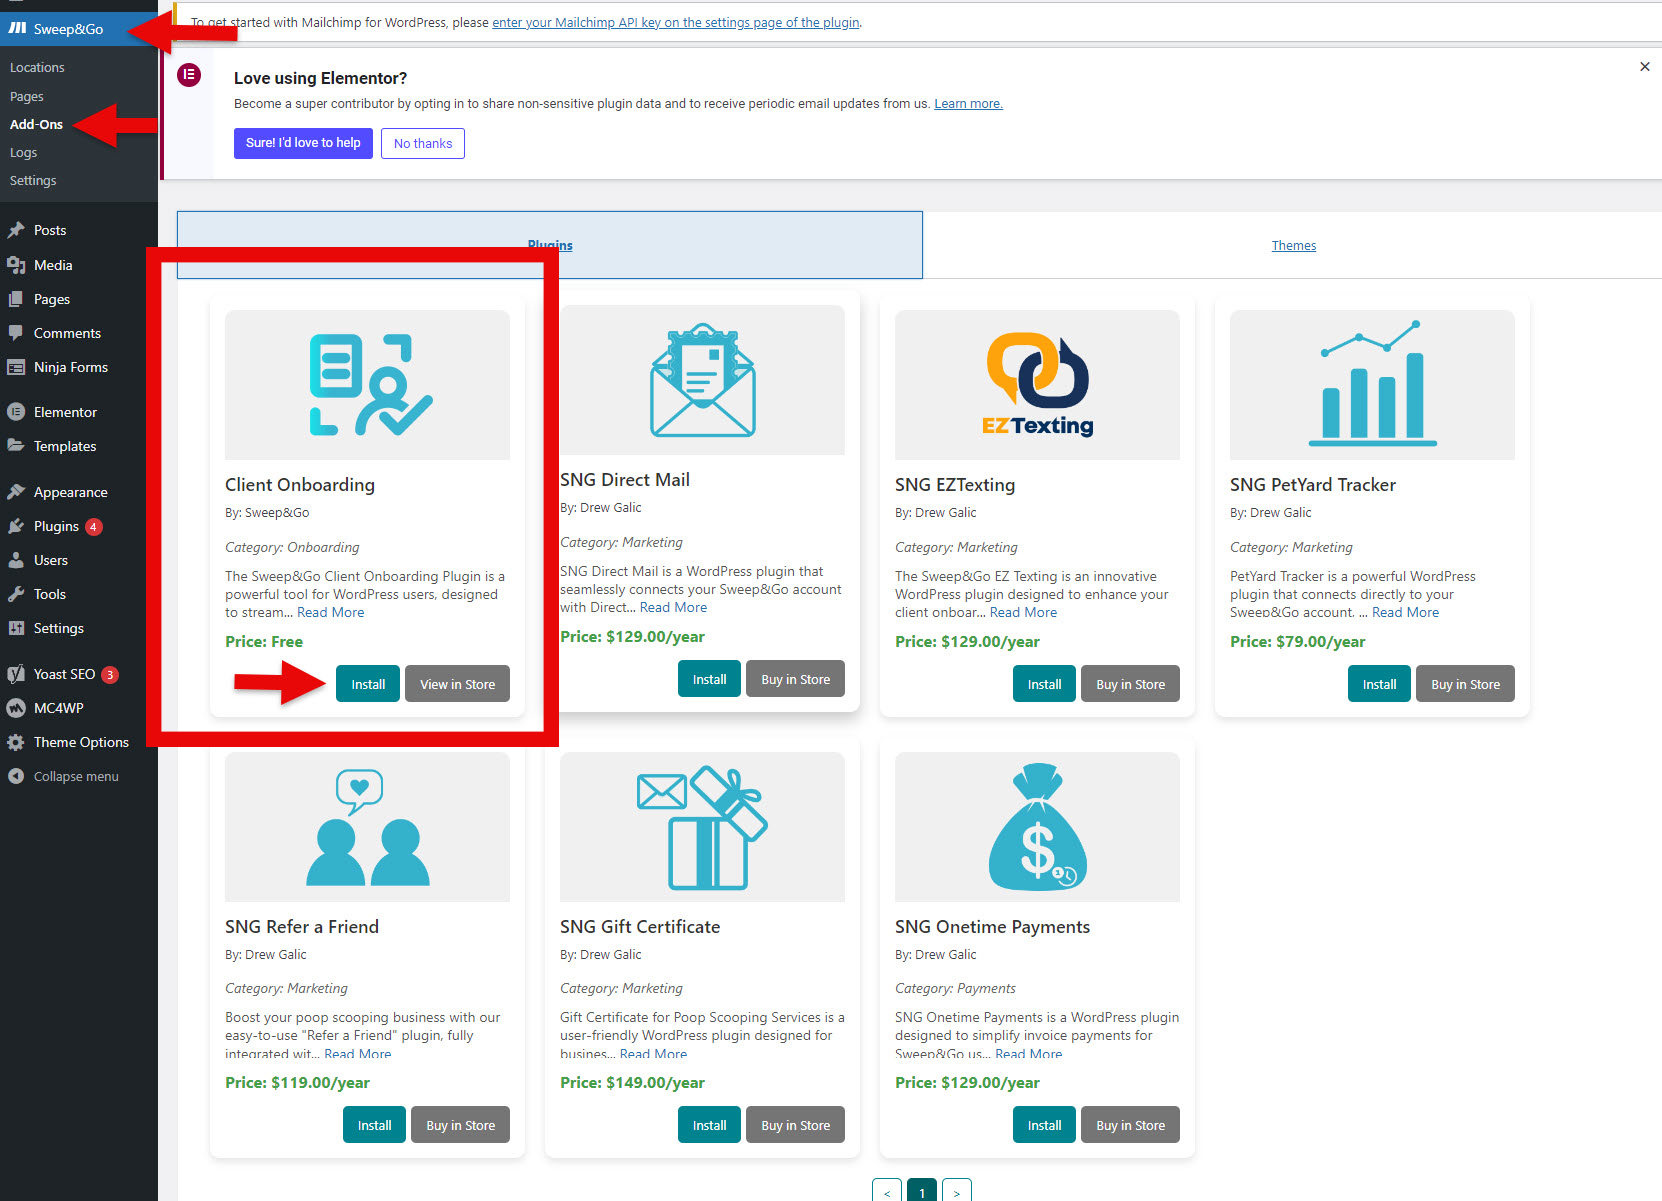
13. From there go to “Sweep&Go” > “Add-Ons” > Click on “Install” to install the Client Onboarding plugin
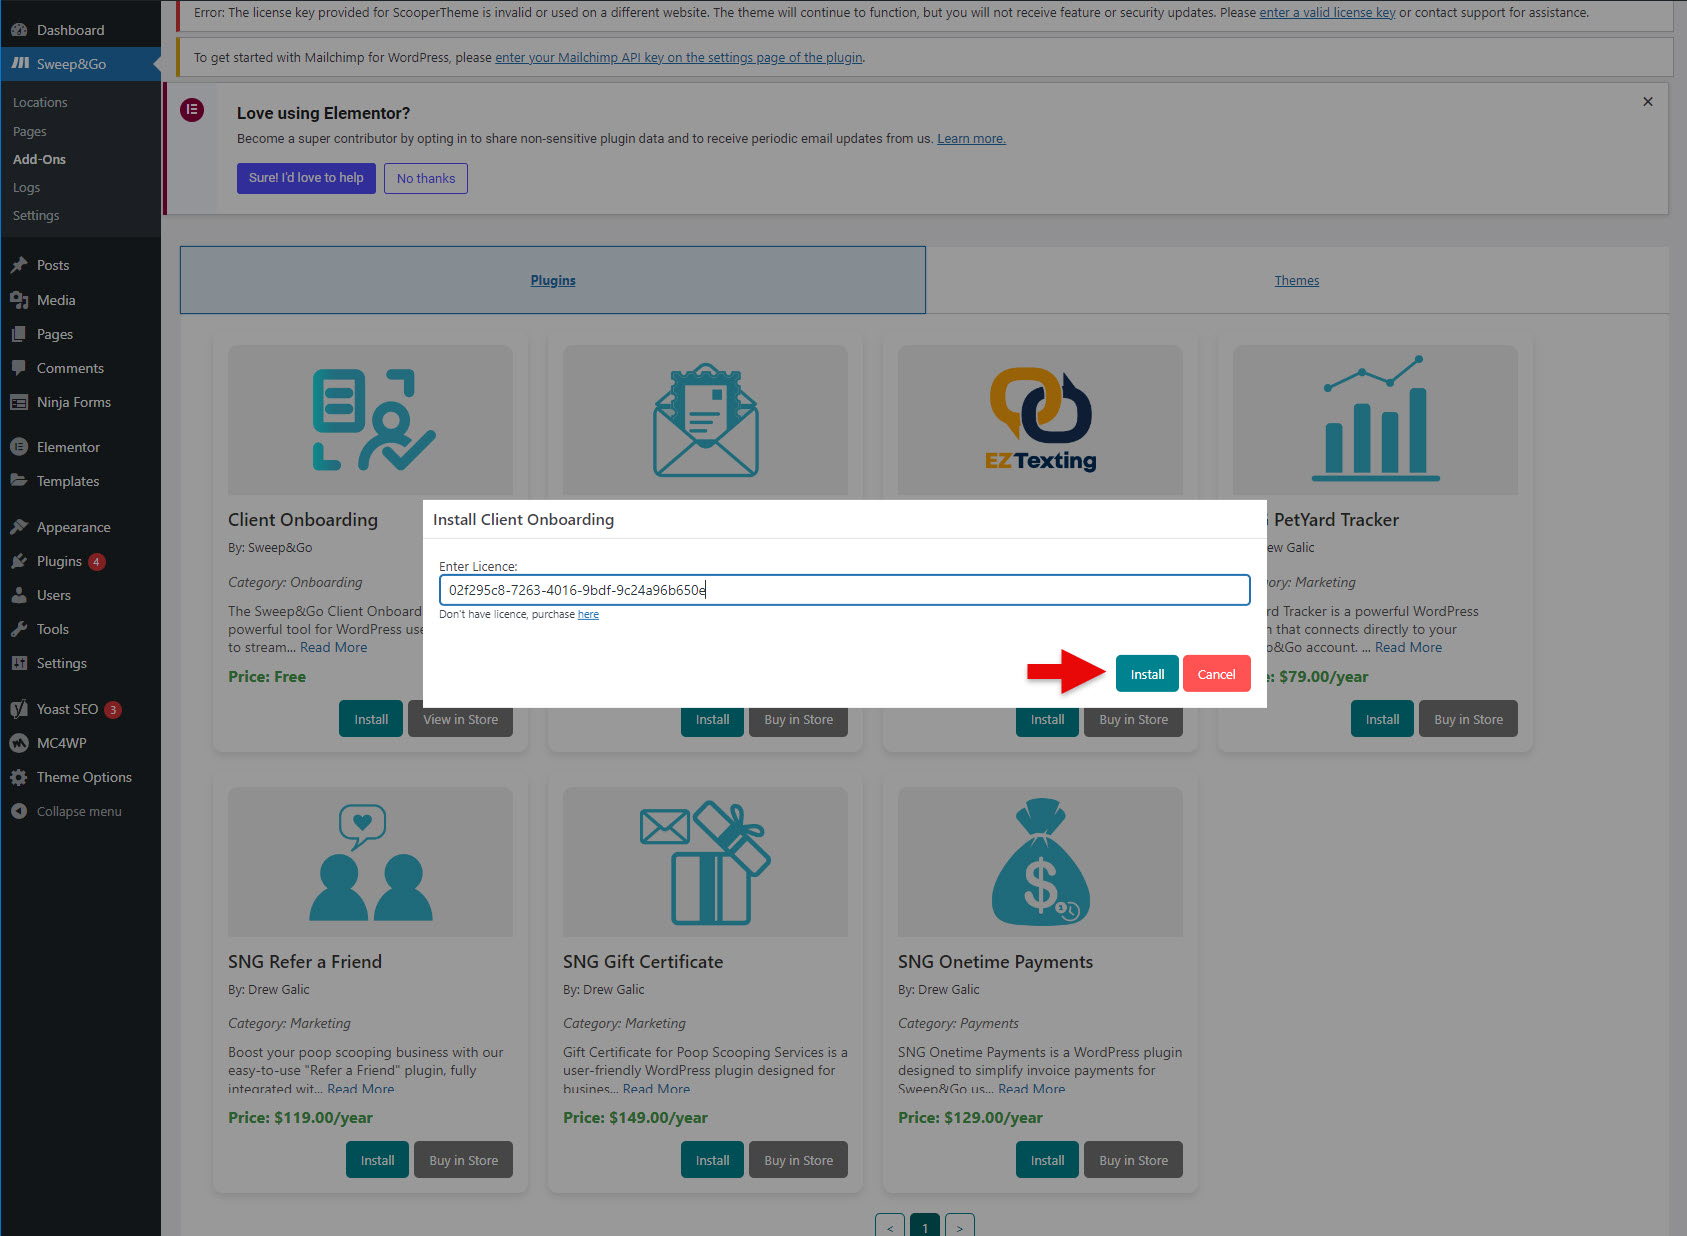
14. Enter license number you received via email after purchasing Client Onboarding and click on “Install”
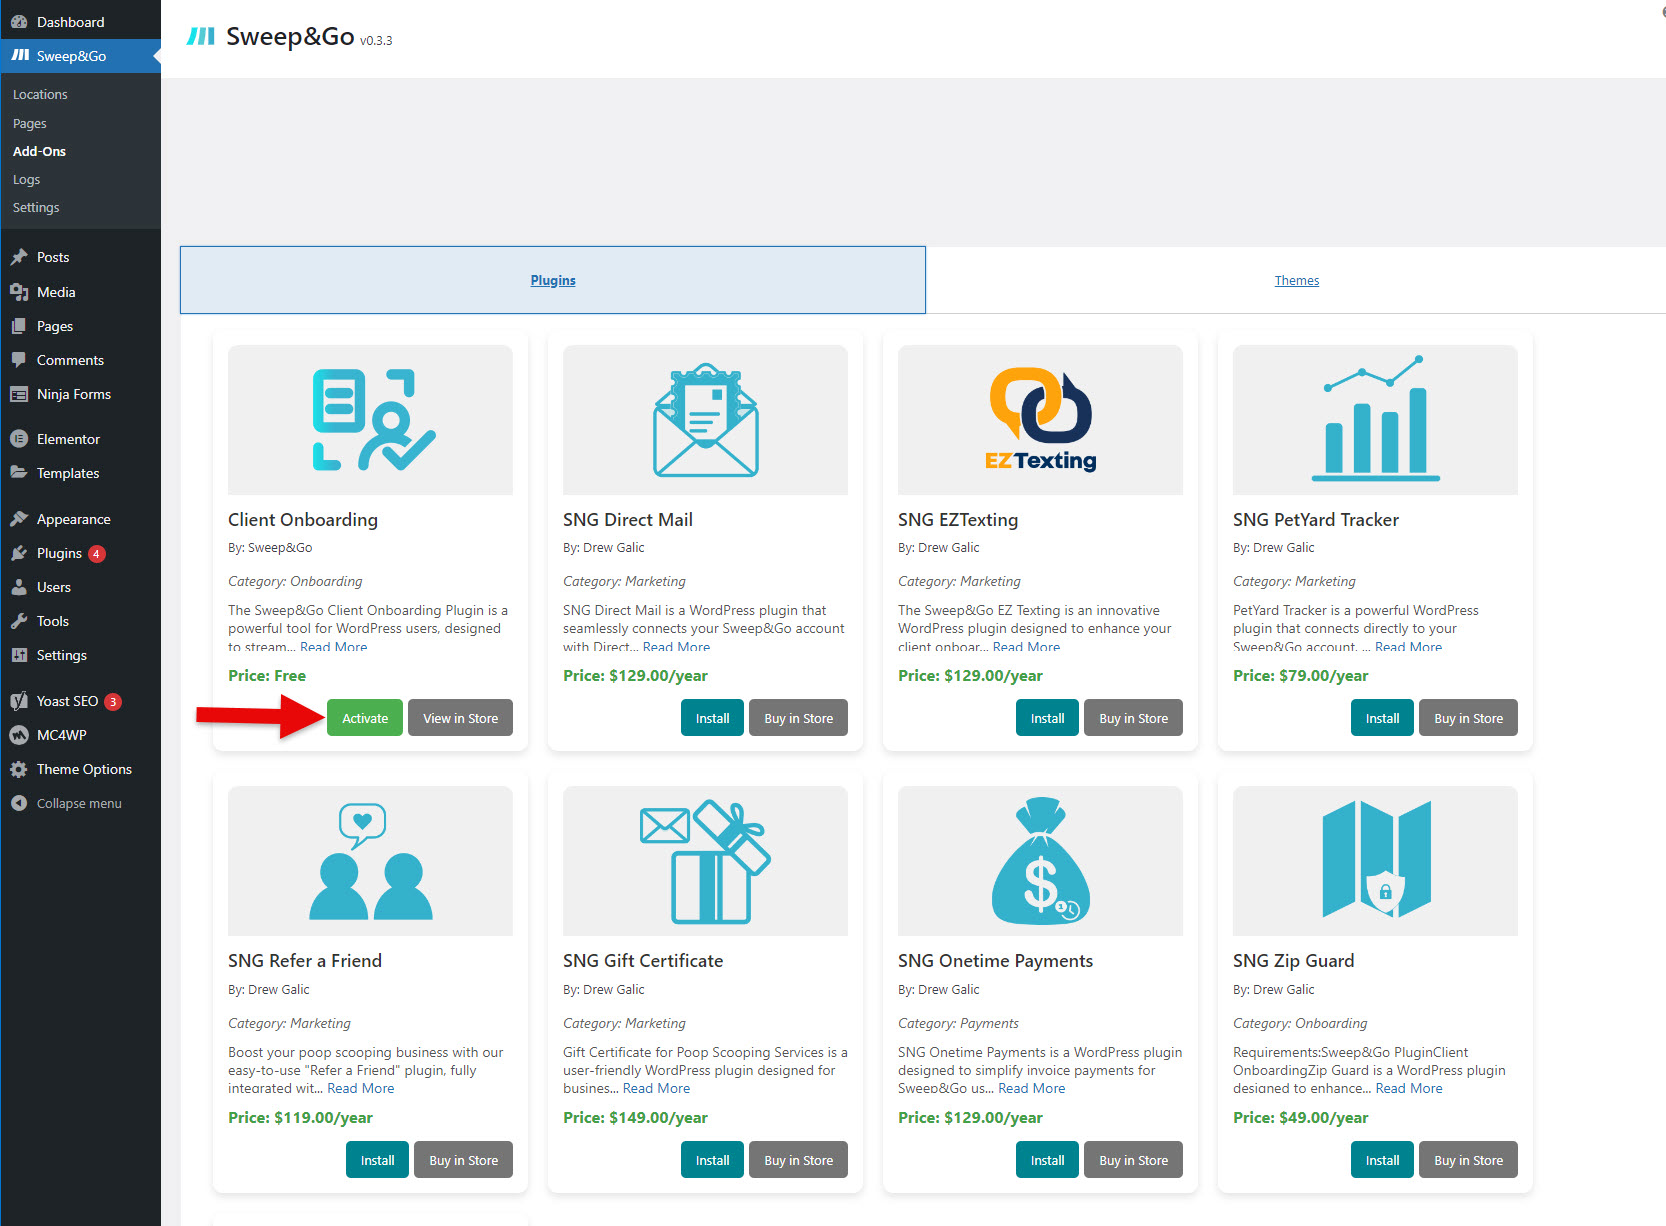
14. After license is validated, click on “Activate”
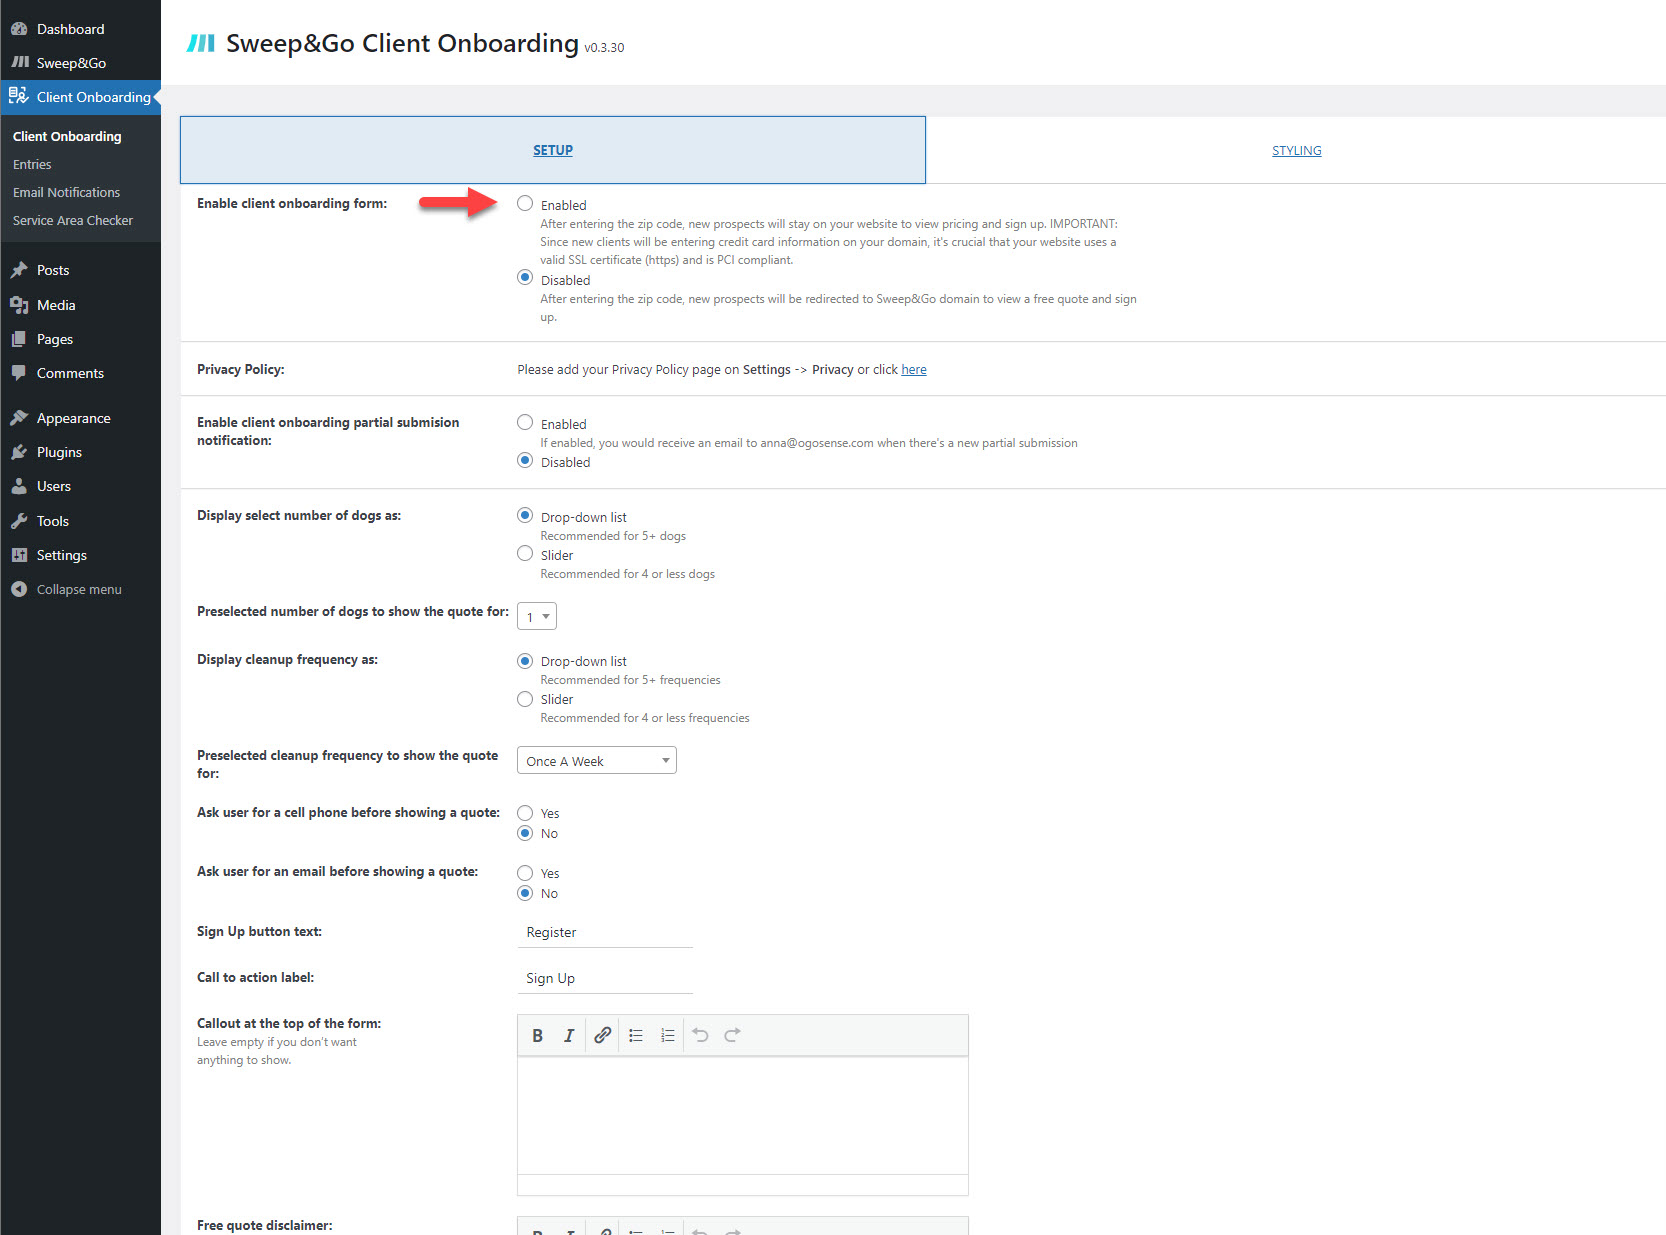
16. Go to “Client Onboarding” and select “Enabled” to enable client onboarding form
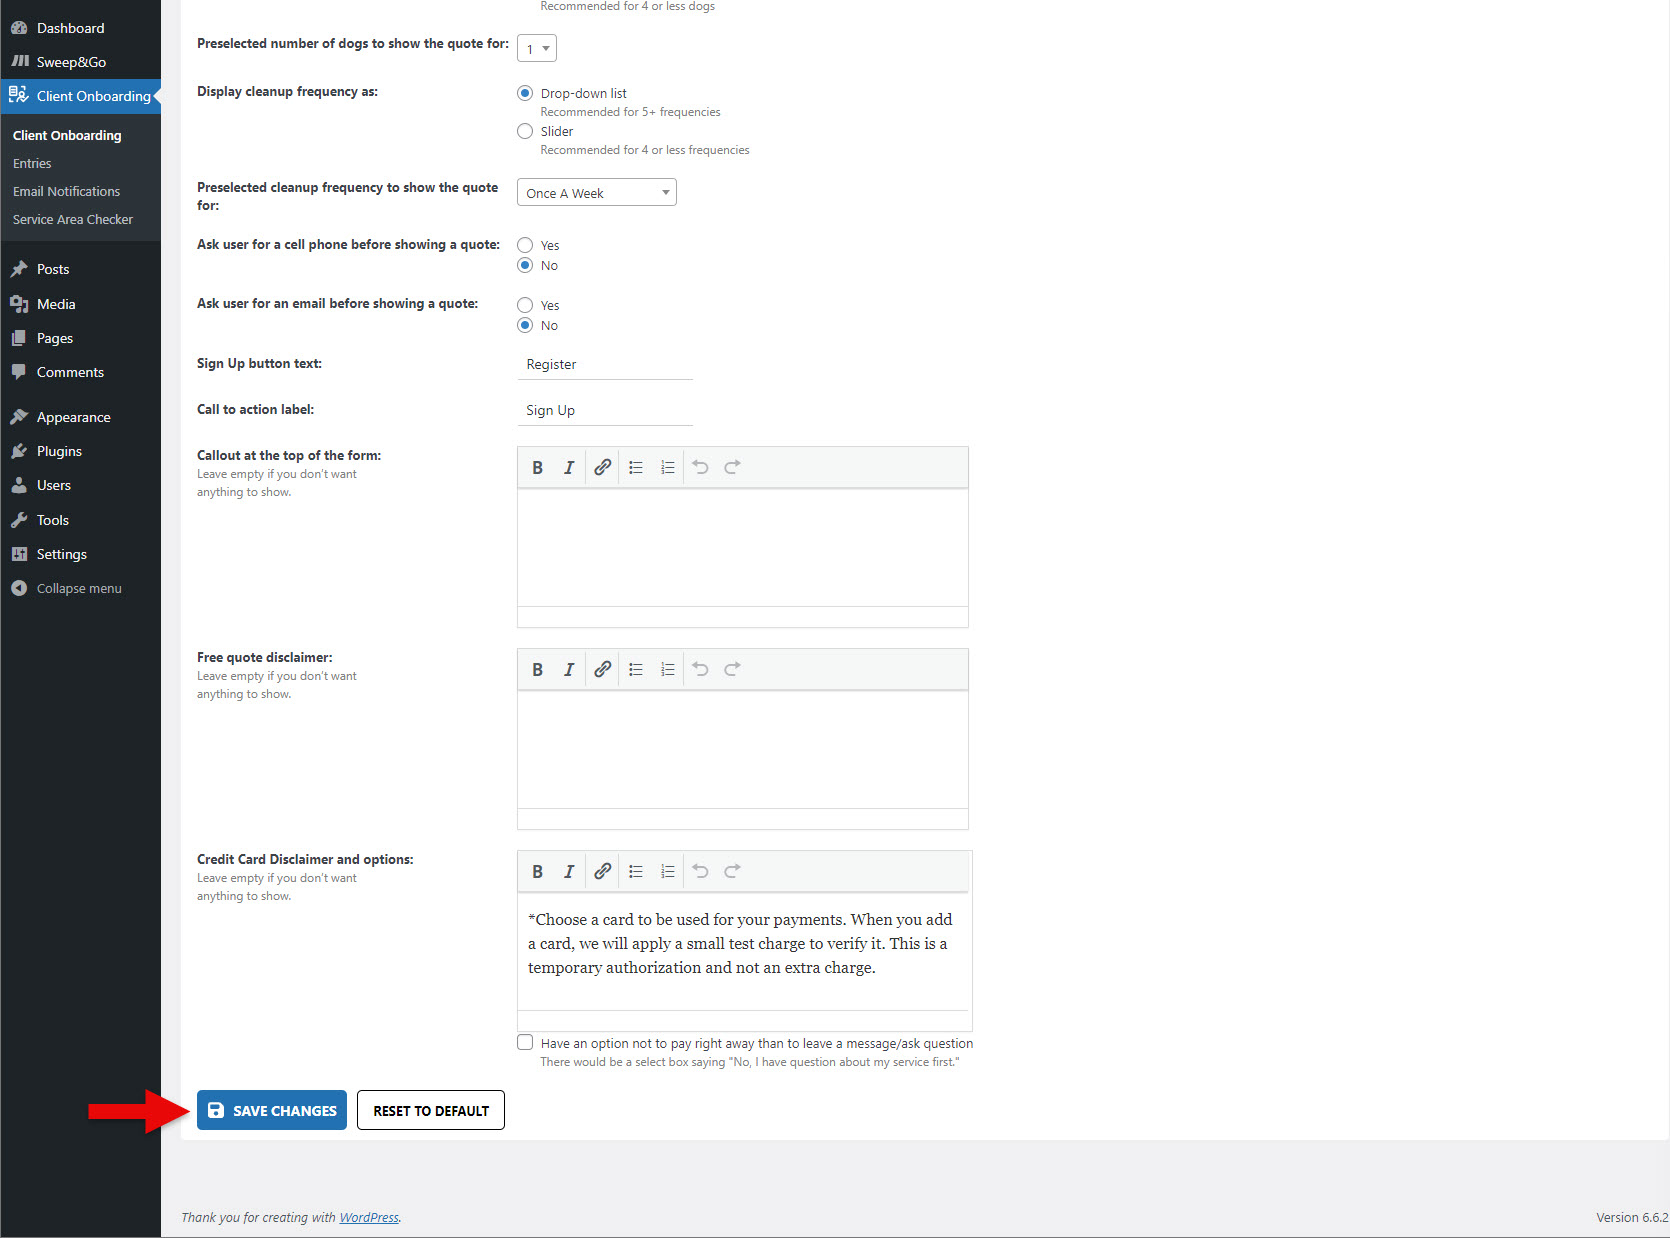
17. Scroll down and click “Save Changes”
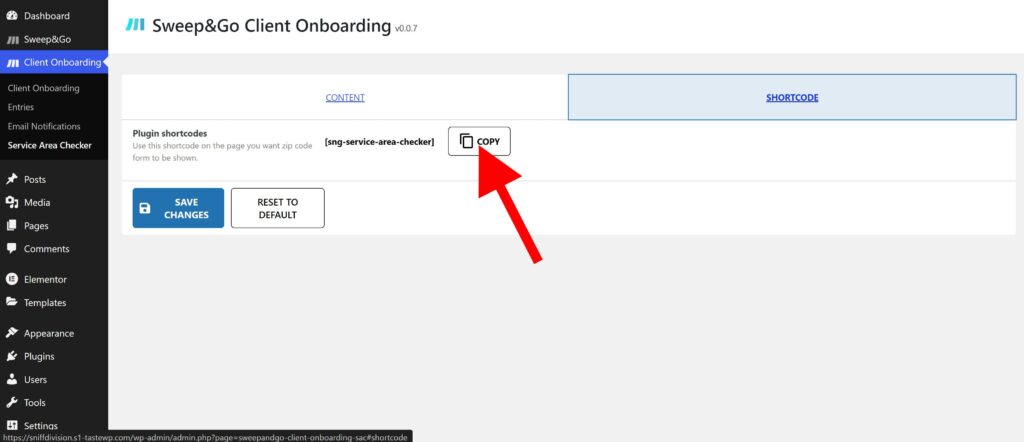
18. To show the Client Onboarding Zip Code Checker go to “Client Onboarding” > Service Area Checker, copy the shortcode and add it to your page
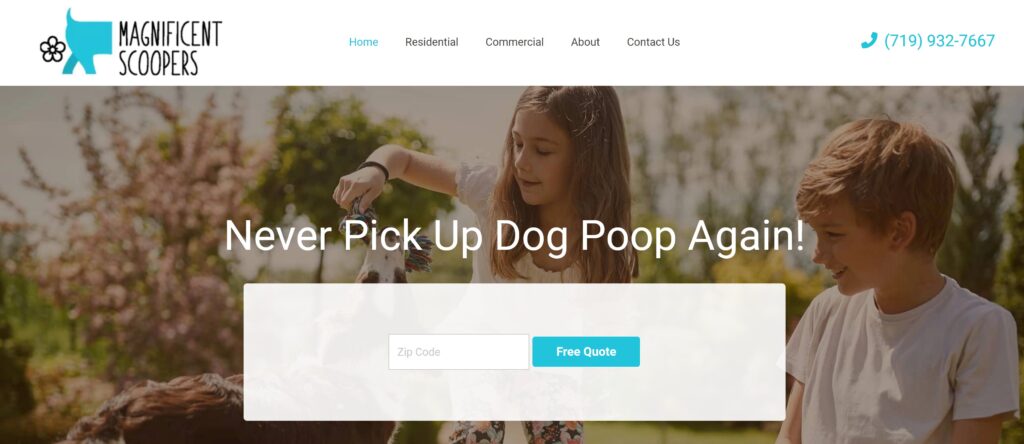
19. Showing zip code checker on the homepage
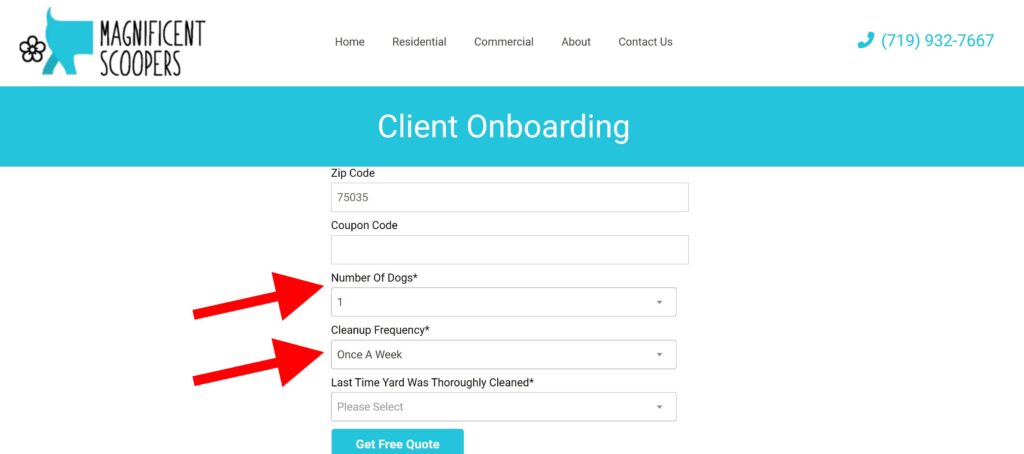
20. By default, the number of dogs and cleanup frequency will be shown as a dropdown list:
You can change this to be a slider by going to “Client Onboarding” and selecting slider for both options if you would like to:
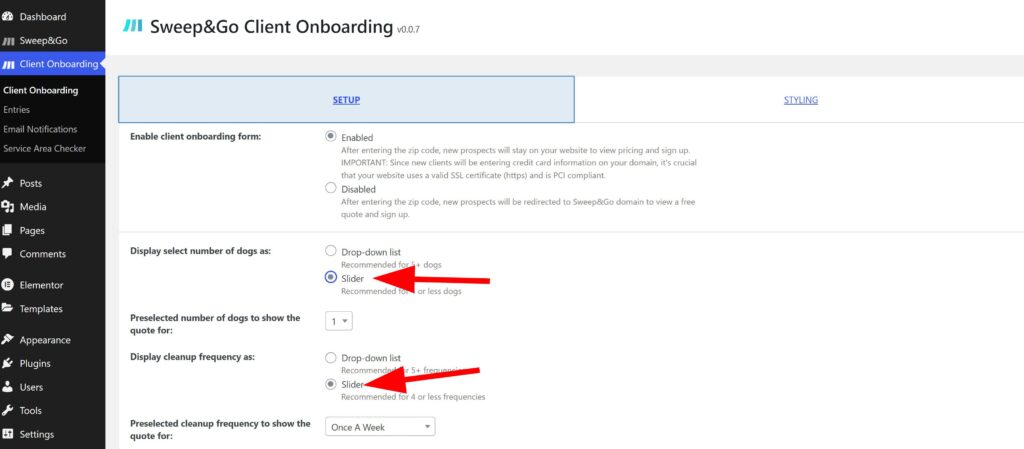
Scroll down and click “Save Changes” to save these changes and check how it looks now.
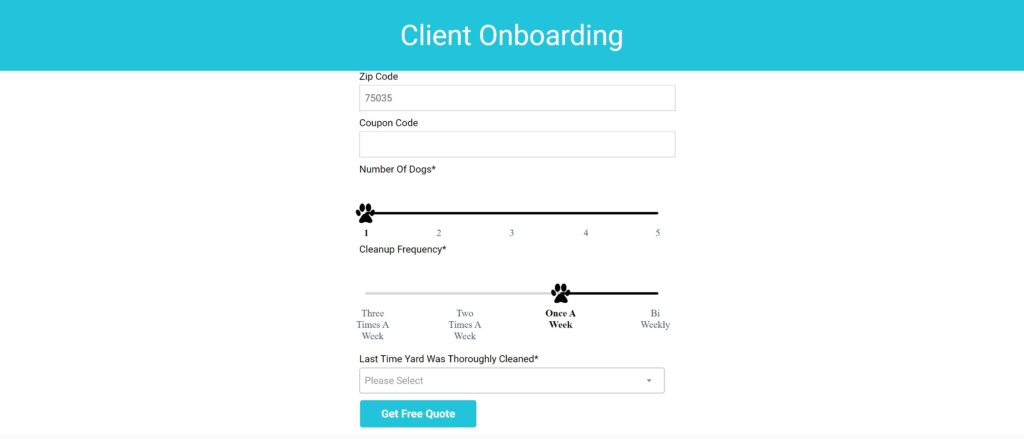
21. You may stylize the slider however you like by going to “Client Onboarding” > Styling
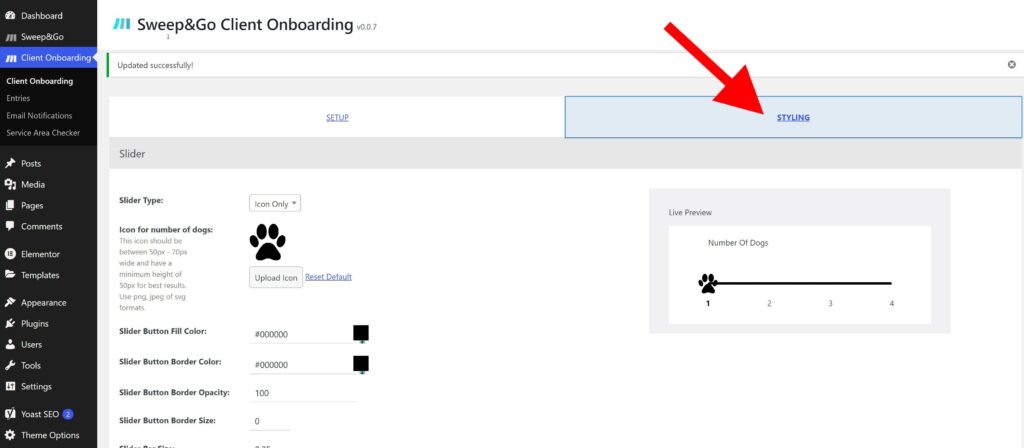
For detailed guidance on styling the client onboarding form, refer to our step-by-step tutorial available here.
Instructions for upgrading from Sweep and Go Client Onboarding (Version: 0.6.2)
In case you already have installed the 0.6.2 version of the plugin your Client Onboarding is looking like this:
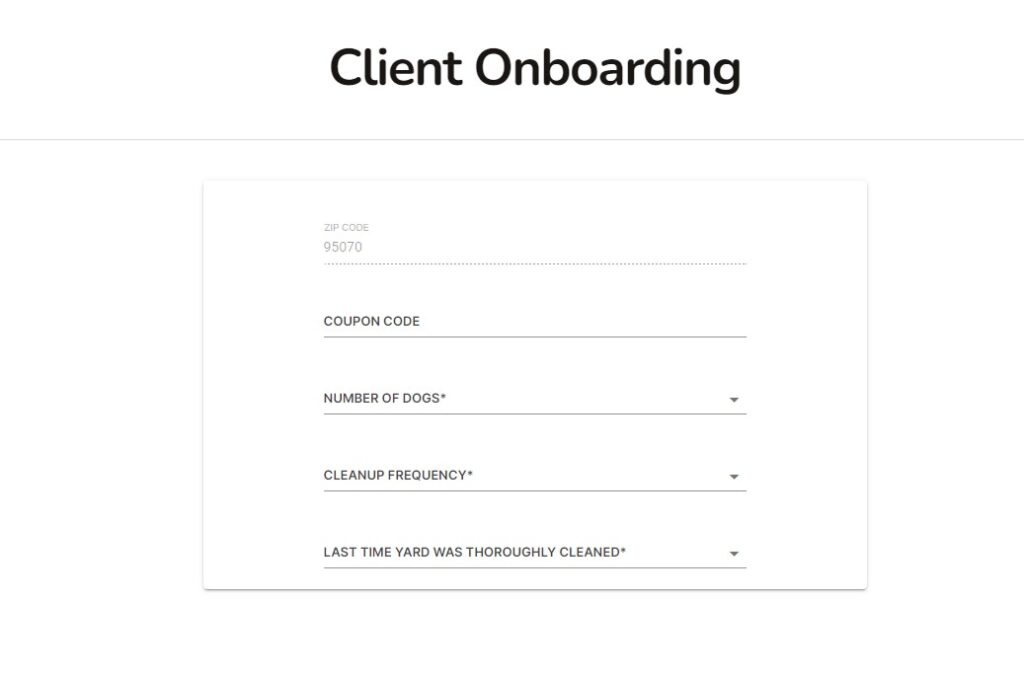
Styling for this plugin is default and it is coming from the Sweep & Go. There’s not much styling here that you would need to preserve for the new version.
CSS classes are different in the new version and it’s much easier to use them for styling than in a previous version (0.6.2).
Instructions for upgrading from Sweep&Go Client Onboarding (Version: 1.0.0)
Database Cleanup
Note: Recommended for developers only.
The new version of the plugin might have some conflict with the previous version that uses Open API we recommend you do a database cleanup.
These are the tables you have to delete before you install a new plugin:
- Sng_locations
- Sng_location_settings
- Sng_submissions
- In {wpprefix}_options table delete the following (search by option_name row)
- Onboarding_form_overwrites
- Anything starting with sng_% prefix
- From {wpprefix}_posts table delete all posts that are sng_page type
Client Onboarding Styling
If you are upgrading from the Sweep&Go Client Onboarding (Version: 1.0.0) that was based on the Open API these are the instructions you need to follow.
Since you will have to delete the plugin and clean up the database we recommend that you do it first on a staging/development environment. After deleting you will lose your plugin’s settings and slider styling.
In case you want to do it directly on a live domain we recommend taking a screenshot of those settings so you can easily recreate them after you install a new version.
When it comes to other parts of the styling of the client onboarding, CSS classes are the same and you will not lose that after you delete the old version of the plugin.
If you have any questions, please contact us: https://www.sweepandgo.com/contact/